
This is a hands-on follow up to the article Four Rules of Vibe Coding (Without the Chaos).
This guide dives deep to put those principles into practice, specifically in Claude Code.
This guide is for developers or tech savvy product managers who want to build production-grade applications. It's designed for those building the first versions of a product or iterating on existing production codebases (alone or in a small team).
This isn't a guide for people who expect to type 3 sentences into a chat box and get a working application without understanding what the AI did for them. If you're serious about building something into production, you need to put in the work. The setup takes time, but it pays off massively in the end.
This guide was written based on:
- 600+ hours of vibe coding
- $3,000+ spent on tokens
- battle tested on several production applications: videosupport.io, craftnow.ai, aqualeads.co
You don't need to implement every recommendation here from day one. Start simple, and refer back to this guide when you hit walls or waste time on repetitive issues.
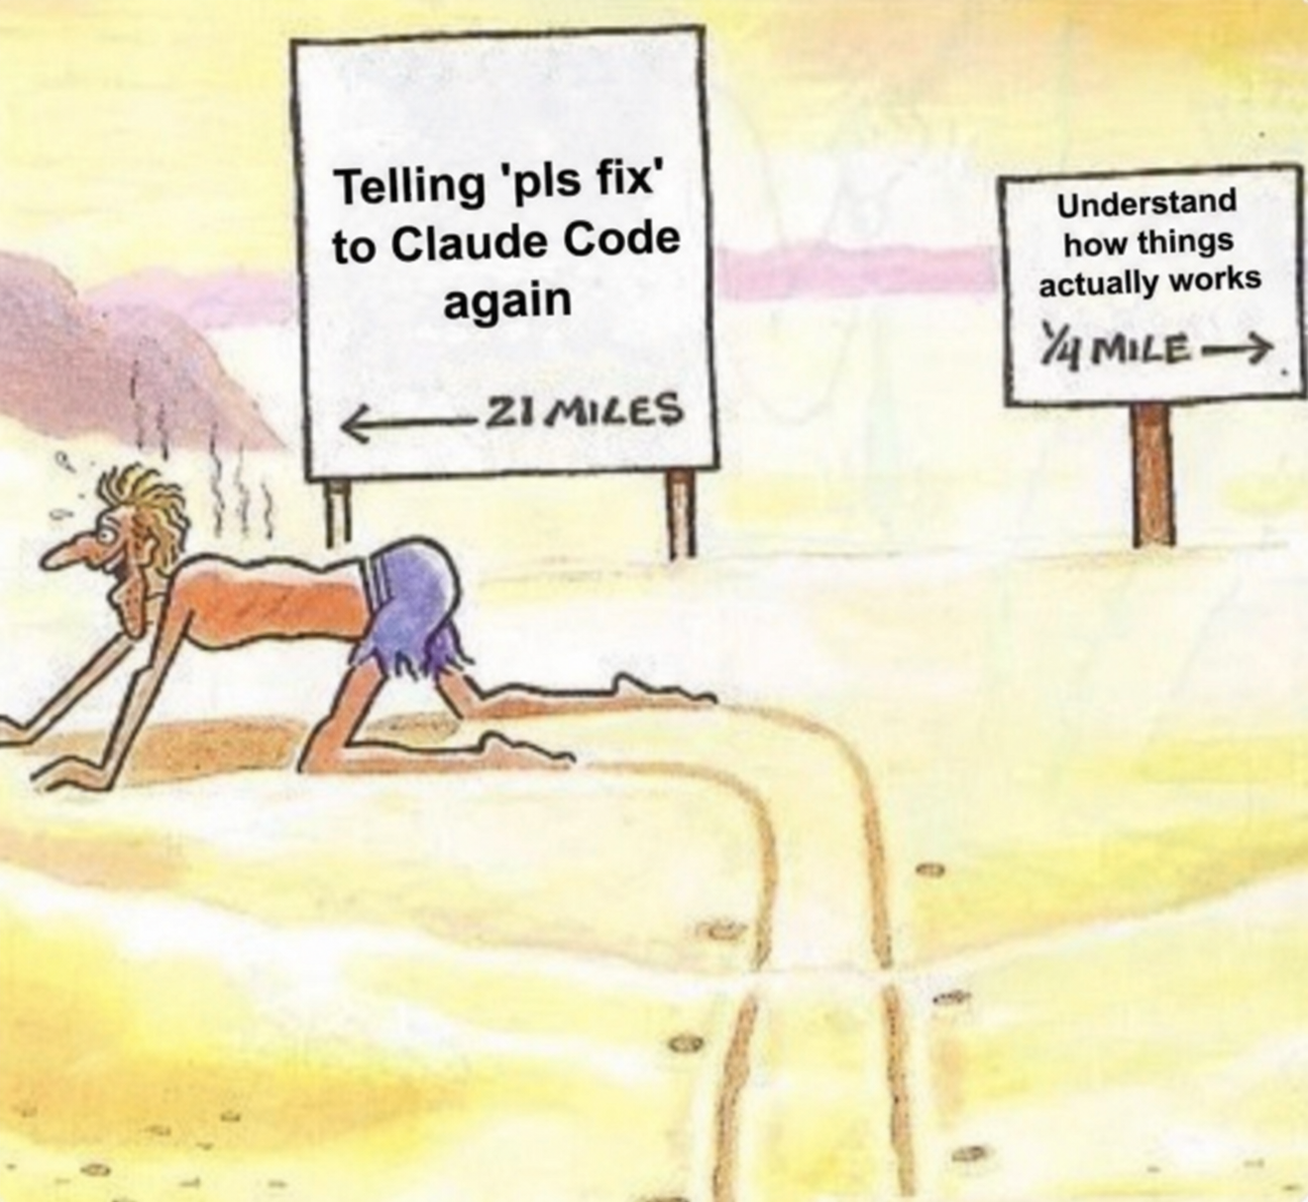 We've all been there...
Use these links below to easily jump back to each section along your journey:
⚙️ Part 1: Basic Setup
🏗️ Part 2: Repository Setup
📝 Part 3: Writing Specifications
✂️ Part 4: Task Breakdown
🧩 Part 5: Context Window
🤝 Part 6: Human in The Loop
🧪 Part 7: Testing Gatekeepers
🐛 Part 8: Debugging
👀 Part 9: Code Reviews
📦 Part 10: Version Control
🚀 Part 11: Deployment
🔒 Part 12: Special Audits
⚡ Part 13: Tips and Tricks
📋 Your Claude Code Vibe Coding Checklist
A Quick Note
You'll notice this guide has a lot of information and recommendations. It might feel like it kills the vibe, right? All this planning before Claude Code writes a single line of code?
Here's the thing: You wouldn't hire a bridge engineer who says "I'll just vibe it."
Imagine asking someone to build a bridge across a river in your city. They show up and say, "I don't have plans, haven't really thought this through, no process, but don't worry, I'm just going to vibe it." You'd never drive on that bridge.
There's a difference between sketching a bridge on paper (which feels easy, almost playful) and building the actual structure that thousands of people will drive across every day. The same applies to code. Prototypes can be vibed. Production applications - the ones real users depend on, the ones that handle payments, store data, and need to work reliably - require intentional planning and a mix of specific skills.
Or maybe you'd prefer this...
📦 Templates
Across this guide, I will reference certain documents or prompts that I use in my setup. You can download all of them here. It contains:
-
Claude Code Instructions - Pre-configured
CLAUDE.mdand.claude/rules/files that you can drop in your project, including a self-improvement template for recurring mistakes. -
Specification Documents - Product requirement templates, user story and acceptance criteria tracking, UX/UI specification sheets and more.
-
Agent Prompts - Prompts for the different agents used across our entire development flow (Product Manager, UX/UI designer, Software Architect, etc.)
-
Subagents - The same four roles packaged as Claude Code subagent definitions for
.claude/agents/, each with its own tools and model. -
Claude Code Skills - Reusable commands for commits, branch creation, debugging, code review, and special audits.
-
Hooks - A notification hook, an async lint hook, and a
PreToolUsetest gate that blocksgit commitwhen the tests fail.
Feel free to drop them into your project and refine them over time.
You'll notice those templates come in two formats:
.md- For instructions, skills, prompts, and documentation (LLMs read these best).json- For structured data like configuration and lists (LLMs edit these reliably)
LLMs excel with markdown because it's plain text with clear structure, and JSON because it's predictable and parseable. Use .md files for any text-based instructions you want LLMs to understand, and .json for data that needs to be parsed or sorted. The one exception is the YAML frontmatter that Claude Code expects on rules, skills, and subagent files. Keep it to a few keys and let the Markdown body carry the instructions.
The Claude Code primitives behind this guide
Everything below is built on a small set of Claude Code features. If you know them, the rest of the guide is just applying them in order.
| Primitive | What it does | Where this guide uses it |
|---|---|---|
CLAUDE.md and .claude/rules/ | Persistent instructions, scoped by path | Parts 1, 7, 10 |
| Permissions and the sandbox | What Claude may read, edit, and run | Parts 1, 6, 11 |
| Plan mode | Research and a plan before any edit | Parts 3, 4 |
Subagents (.claude/agents/) | Specialized roles with their own context and model | Parts 3, 4 |
Skills (.claude/skills/) | Repeatable procedures behind a /command | Parts 8, 9, 10, 12 |
| Hooks | Deterministic checks on lifecycle events | Parts 7, 10, 13 |
Background tasks and /tasks | Long-running servers and watchers | Parts 7, 8 |
Checkpoints and /rewind | Session-level undo | Part 13 |
| Worktrees | Parallel sessions without file conflicts | Part 10 |
Let's get to it.
⚙️ Part 1: Claude Code Basic Setup
Claude Code runs in your terminal, inside supported IDEs, in the Claude desktop app, and on the web. This guide is CLI-first because the terminal gives you the clearest view of what the agent is doing and works with any editor.
Install Claude Code, move into your repository, and start a session:
curl -fsSL https://claude.ai/install.sh | bash
cd your-project
claude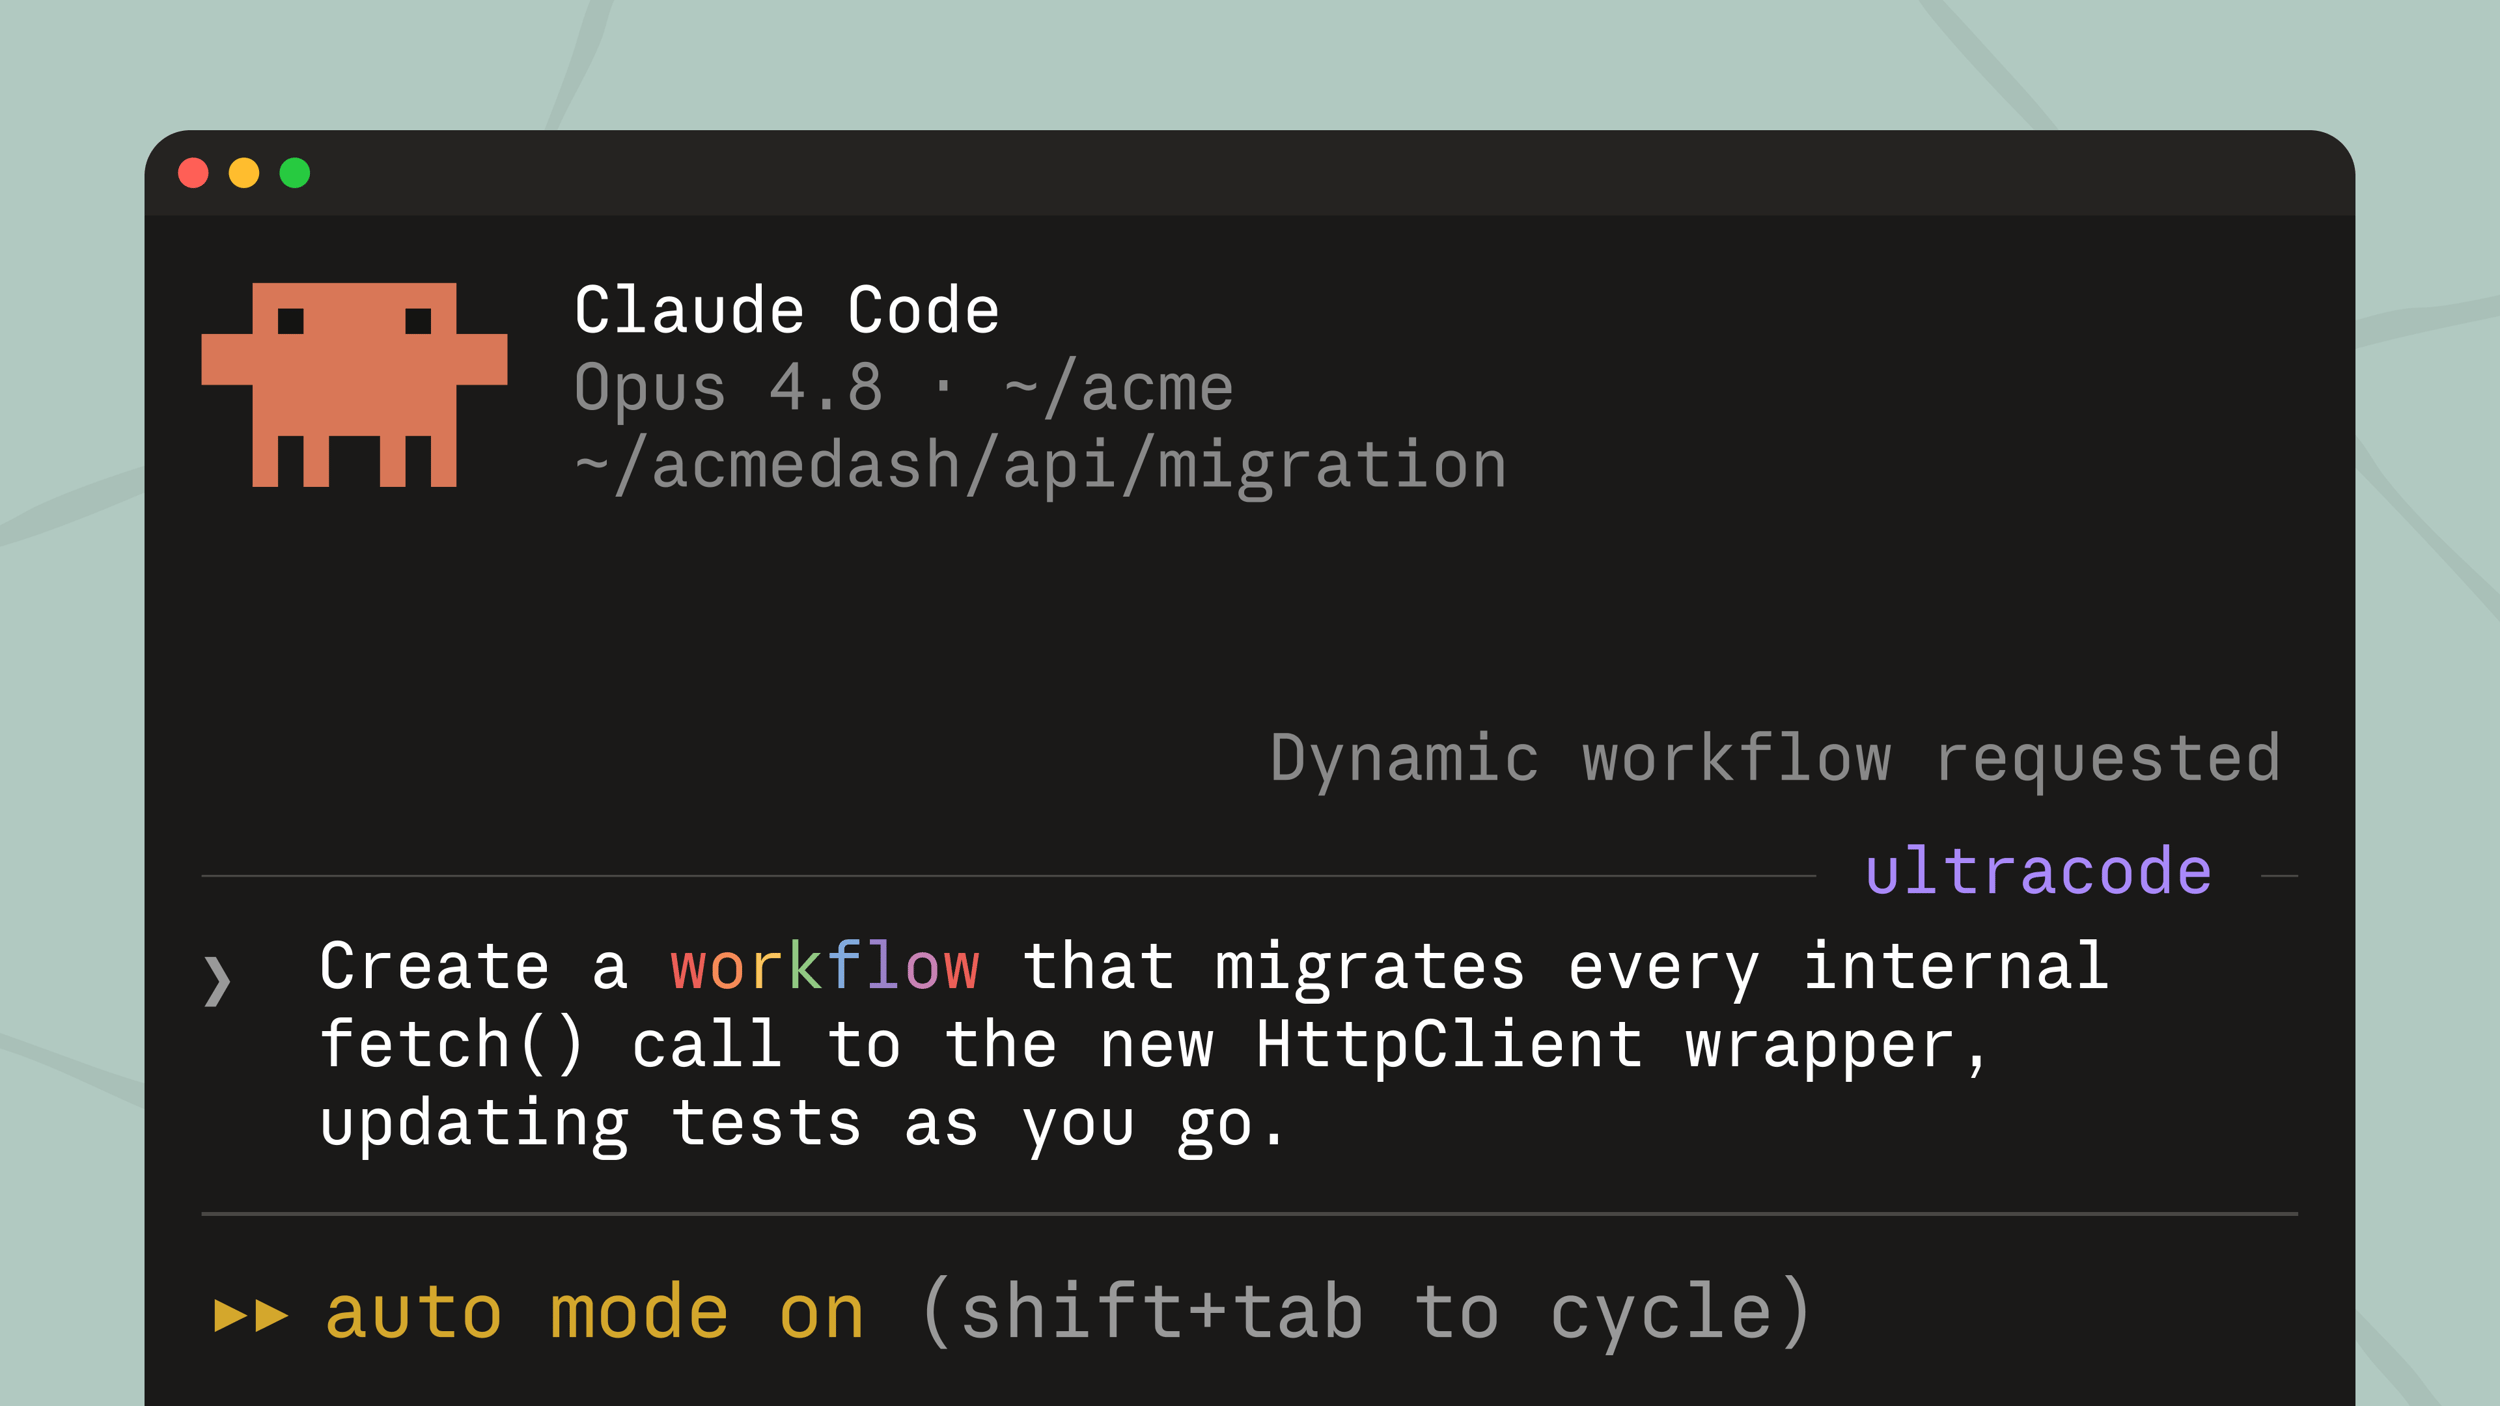 Claude Code in the terminal
You can also install the official Claude Code extension for VS Code. It gives you inline diffs, file mentions, plan review, and conversation history inside your editor. The underlying agent and project configuration are the same.
Permission Modes
Claude Code separates agent behavior from permission control. You can switch the main modes with Shift + Tab in the terminal:
-
Default- Claude reads files without asking, but requests permission before edits and most shell commands. This is the safest place to start. It shows no label in the prompt, and the settings value is"default". -
Accept Edits- Claude can edit files and run common filesystem commands inside the working directory. Other commands still require approval. -
Plan Mode- Claude researches the codebase and produces a plan without editing your source. Switch into it with/planorShift + Tab, or start withclaude --permission-mode plan. -
Auto Mode- Claude runs without repeated permission prompts while a separate classifier checks whether each action matches your request. It is available only when your plan, organization, model, and provider meet the current requirements. It is useful for long tasks, but it does not guarantee safety or replace review.
Claude Code also provides dontAsk for locked-down automation and bypassPermissions for isolated containers or virtual machines. Do not use bypass mode on your normal machine. The name is not joking.

This guide focuses primarily on Plan Mode, followed by Accept Edits or Auto Mode during implementation.
Start with one local session. Learn how Claude explores, edits, runs commands, and asks for help. Once you understand those patterns, you can add subagents, worktrees, background sessions, or agent teams. Parallelism is powerful, but it also multiplies bad instructions.
Agent Tools Overview
Claude Code includes the core tools needed for most coding tasks:
Search and Research Tools
Read- Read files and inspect source codeGlob- Find files using filename patternsGrep- Search text and regular expressions across the repositoryWebSearchandWebFetch- Find and read current external information
Edit Tools
Edit- Apply focused changes to existing filesWrite- Create files or replace their contents- Notebook tools - Read and edit Jupyter notebooks when relevant
Run Tools
Bash- Run shell commands, tests, linters, builds, Git, and local development tools- Background tasks - Keep long-running processes active while Claude continues other work
Delegation and External Tools
- Subagents - Run research or specialized work in a separate context window
- MCP tools - Connect Claude Code to browsers, databases, project management tools, and external services
- Claude in Chrome - Use your visible, logged-in browser for testing and debugging when your plan supports it
Settings That Matter
Claude Code has plenty of configuration. Start with permissions, protected files, and automated feedback.
Permissions: Run /permissions to review allowed, blocked, and approval-required tools. Project settings live in .claude/settings.json. Personal project settings that should not be committed live in .claude/settings.local.json.
{
"permissions": {
"defaultMode": "default",
"allow": [
"Bash(pnpm test:*)",
"Bash(pnpm lint:*)",
"Bash(git diff:*)",
"Bash(git status:*)"
],
"deny": [
"Read(./.env)",
"Read(./.env.local)",
"Read(./.env.production)",
"Read(./secrets/**)"
]
}
}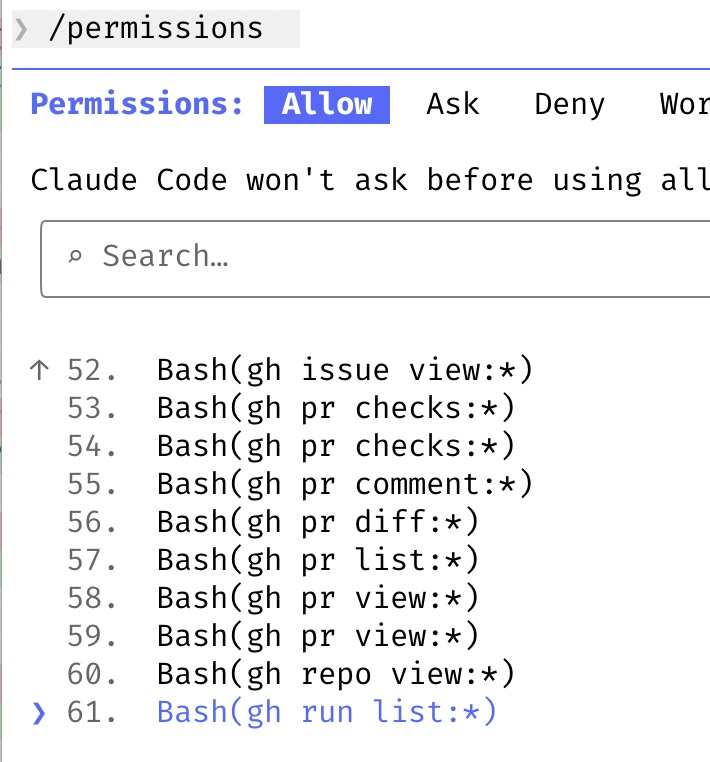 Review permissions with /permissions
Screenshot: Boris Cherny, creator of Claude Code.
Be careful with access rules. A Read deny rule blocks Claude's built-in file tools, but it does not stop a Bash command such as cat .env. For sensitive projects, use Claude Code's OS-level sandbox or a development container. Permissions are useful controls. They are not a replacement for isolation.
Automated lint feedback: Claude Code does not have a single “auto-fix lints” toggle. Use a PostToolUse hook to run your formatter or linter after edits and return the result to Claude.
{
  "hooks": {
    "PostToolUse": [
      {
        "matcher": "Write|Edit",
        "hooks": [
          {
            "type": "command",
            "command": "pnpm lint"
          }
        ]
      }
    ]
  }
}
Keep the command fast. A hook that takes two minutes after every edit will make you hate hooks in less than one afternoon.
Files Claude Should Not Read
Control file access with permission rules and sandbox settings:
- Use
Read(...)deny rules for environment files, credentials, private exports, and local data - Use
Edit(...)deny rules for generated files or sensitive configuration - Use the sandbox when access must be blocked for both built-in tools and shell commands
- Keep secrets out of the repository and document placeholders in
.env.example
The templates include a safe starting point in /setup/.claude/settings.json. Review it before copying it. Your file structure and commands will be different.
Claude Code Instructions: Best Practices
Persistent instructions shape how Claude behaves in your project. Claude Code has three practical layers: project instructions, scoped rules, and user instructions.
1. Project Instructions (CLAUDE.md)
Place CLAUDE.md at the root of your repository. It is version-controlled and loaded at the start of each session.
Use it for:
- Project purpose and architecture
- Common development, test, lint, and build commands
- Naming and code conventions
- Important paths and existing patterns
- Actions Claude must always take or avoid
📝 Click to see example CLAUDE.md
Project Instructions
Commands
- Install dependencies with
pnpm install - Run tests with
pnpm test - Run lint with
pnpm lint
Code Style
- Use TypeScript for all new files
- Prefer functional React components
- Use snake_case for database columns
Architecture
- Use Server Components by default
- Keep business logic in service modules
- Do not access the database from UI components
Keep the root file concise. Anthropic recommends staying under roughly 200 lines. Large procedures belong in skills. File-specific guidance belongs in scoped rules.
2. Scoped Project Rules (.claude/rules/)
Rules are Markdown files stored in .claude/rules/. Rules without metadata load in every session. Rules with paths frontmatter load only when Claude works with matching files.
📁 Click to see example structure
project/
  CLAUDE.md
  .claude/
    rules/
      testing.md
      frontend.md
      api-security.md
Example path-scoped rule:
paths:
- "src/api/**/*.ts"
- "app/api/**/*.ts"
API Rules
- Validate every external input
- Use the shared error response format
- Check authorization before reading a resource
- Add integration tests for permission boundaries
Scoped rules reduce noise. Testing rules do not need to fill the context while Claude edits a marketing page. API security rules do.
3. User Instructions (~/.claude/CLAUDE.md)
User instructions apply across all projects on your machine. Use them for preferences that are about you rather than one codebase.
Use user instructions for:
- Communication style
- Personal coding principles
- Preferred tools and package managers
- General Git habits
📝 Click to see example user instructions
Reply concisely. Avoid repetition and filler.

Prioritize code readability over cleverness.

Add comments only for complex or surprising logic.

Use meaningful names. Avoid abbreviations.

Keep functions small and focused.

Do not optimize before measuring.
Best Practices for Writing Instructions:
✅ Keep instructions focused and actionable - Short files get followed more reliably
✅ Provide concrete examples - Show the pattern Claude should copy
✅ Put always-on facts in CLAUDE.md - Commands, architecture, and hard constraints
✅ Put conditional guidance in .claude/rules/ - Use paths to limit when it loads
✅ Put repeatable procedures in skills - Do not turn CLAUDE.md into a 2,000-line handbook
✅ Review instructions regularly - Remove rules that no longer match the codebase
❌ Avoid generic advice - “Write clean code” means nothing and everything
❌ Don't overload context - More instructions can reduce adherence instead of improving it
❌ Don't put secrets in instructions - These files are sent as context
Run /memory to see which instruction and memory files Claude loaded. Run /init when you want Claude to inspect a repository and draft an initial CLAUDE.md.
For more details, see the official Claude Code memory documentation.
Self-Improving Claude Code Instructions
Every Claude Code session starts with a fresh context window. Two systems carry useful information forward:
- Curated instructions in
CLAUDE.mdand.claude/rules/ - Auto memory, where Claude stores useful project learnings on your machine
Auto memory is helpful for build commands, debugging discoveries, and preferences Claude learns while working. It is not a substitute for team-shared rules. Review it through /memory, clean up incorrect notes, and move durable team knowledge into version-controlled files.
The Rule of Thrice:
Don't rush to create rules after every error. Follow this simple pattern:
- Once → It's a fluke. Fix it and move on.
- Twice → It's a coincidence. Note it down.
- Thrice → It's a pattern. Create a rule.
After fixing a recurring error, prompt Claude Code:
We've encountered this [specific error] three times now.

Create a focused Claude Code rule that:
1. Documents the mistake
2. Provides the correct approach
3. Includes a code example if relevant
4. Uses paths frontmatter if it only applies to part of the repository

Save it to .claude/rules/[descriptive-name].md
The templates include /setup/.claude/rules/self-improvement.md. It gives Claude a consistent structure without turning every small correction into permanent context.
Picking Your Model
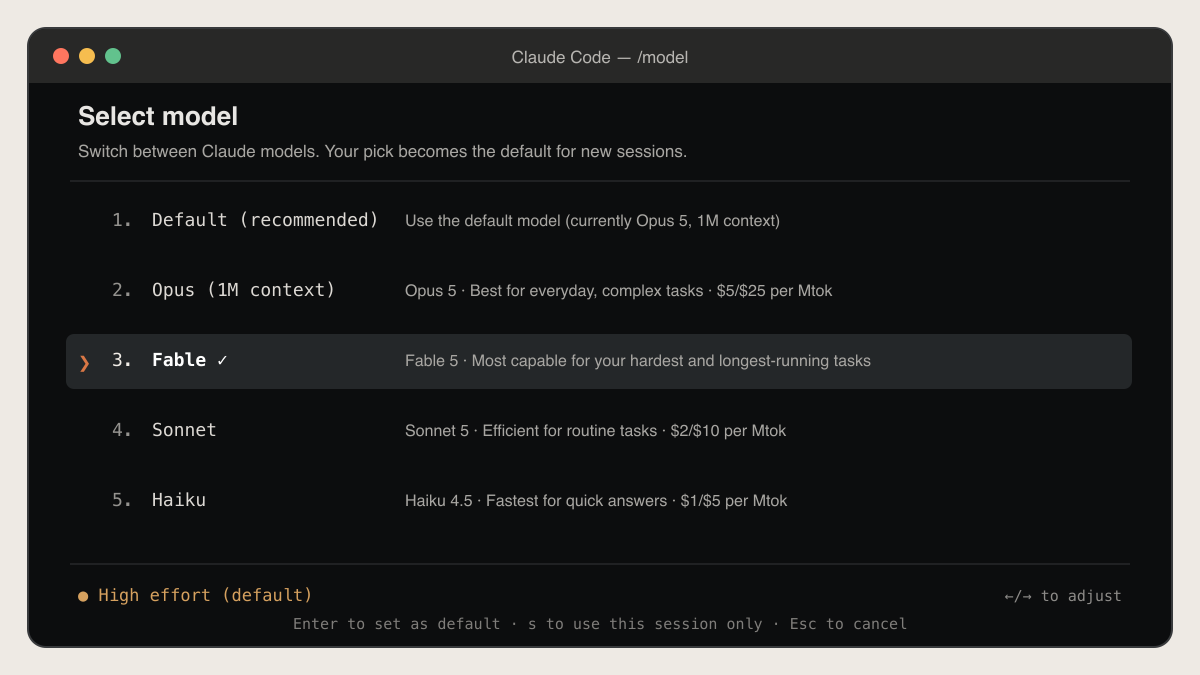 Choose a model with /model (older screenshot: the current names are Fable 5.1, Opus 5.5, Sonnet 5.5, and Haiku 4.5)
Claude Code uses Anthropic models. You can switch with /model, start a session with claude --model <alias>, and adjust reasoning depth with /effort.
Model Selection Guide:
Here has been my experience so far (as of October 2026; this evolves quickly with each new launch):
-
Fable 5.1 - The strongest generally available Claude model for the hardest, longest tasks. Use it when the work needs sustained reasoning, broad codebase changes, or deep investigation. It uses more of your allowance, so reserve it for the work that needs it.
-
Opus 5.5 - The best high-capability default for architecture, difficult debugging, broad refactors, and complex implementation. It gets close to Fable-level capability at a lower cost.
-
Sonnet 5.5 - The best cost-effective default for normal features, tests, fixes, and day-to-day agent work. It is faster and cheaper than Opus while remaining strong at tool use and sustained implementation.
-
Haiku 4.5 - Useful for small, well-scoped tasks and inexpensive subagents. Do not give it a vague migration across 80 files and hope for spiritual growth.
-
opusplan- Uses Opus during planning and Sonnet during execution. This is a strong default for complex features when you want deep planning without paying Opus rates for every implementation step.
Effort levels let you trade speed and token use against reasoning depth. Use low or medium for simple work, high for normal intelligence-sensitive work, and xhigh or max for the difficult cases that justify it.
/model opusplan
/effort high
Claude Code can authenticate through a Claude subscription, the Anthropic API, Amazon Bedrock, Google Vertex AI, or Microsoft Foundry. The model family stays Claude, but your provider, pricing, and available features can differ.
🏗️ Part 2: Repository Setup
Unlike tools like Lovable or V0 that come with predefined stacks, Claude Code works with whatever repository you give it. You can use any stack you want, but this means you need to make several important decisions upfront.
When setting up your repository, you need to answer these critical questions (I'll use a web application as an example):
Key choices:
- Front-end framework - React, Vue, Svelte, or vanilla JS?
- Back-end framework - Next.js, Express, FastAPI, Django, Ruby on Rails or serverless functions?
- Database choice - PostgreSQL, MySQL, MongoDB, or other NoSQL solutions?
- Backend-as-a-Service (BaaS) - Will you use Supabase (includes auth, storage, database, and more) or build a custom backend? I highly recommend Supabase if you want to skip a lot of headaches in the early days.
- UI library - Tailwind CSS, shadcn/ui, Material-UI, Chakra UI, or custom CSS? (I highly recommend Tailwind CSS + shadcn/ui for rapid development)
- Analytics platform - PostHog, Mixpanel, Amplitude, or database-only tracking? Set this up from day one, you can't analyze what you don't track.
If not using a BaaS:
- Authentication system - Auth0, Firebase Auth, Clerk, or custom JWT implementation?
- Storage solution - AWS S3, Cloudinary, UploadThing, or self-hosted storage?
- File handling - How will you manage file uploads, transformations, and media delivery?
Development Setup:
- Testing frameworks - Jest, Vitest, Playwright, or Cypress for frontend/backend testing?
- Package manager - npm, pnpm, or yarn? (if using a Node backend)
- ORM/Database toolkit - Prisma, TypeORM, Drizzle, Sequelize, or raw SQL?
- Deployment strategy - Vercel, Netlify, Railway, AWS, or self-hosted infrastructure?
- Environment management - How will you handle dev/staging/production configurations?
- CI/CD pipeline - GitHub Actions, GitLab CI, CircleCI, or other automation?
Pro Tip: The LLM can help you think through all these questions and make informed decisions based on your project requirements, constraints, and long-term goals. Don't hesitate to ask for recommendations and tradeoffs between different options.
⚠️ Don't Skip Analytics
Analytics might feel premature when you're just starting, but here's the reality: the whole point of shipping features is to learn from real user behavior. If analytics is an afterthought, your ability to make data-driven decisions becomes an afterthought too. By the time you realize you need to track something, you've already lost weeks or months of valuable data.
Two Recommended Stacks:
In the end, the best stack is the one you master. If you don't have much experience with any stack, below are two stacks that I've been playing around with and got good results:
-
Modern Startup Stack: Next.js + React + Supabase
- Tons of features out-of-the-box from Supabase (auth, database, storage, real-time)
- Just make API calls, no backend complexity
- Popular choice for new projects and startups
- Great TypeScript support and modern tooling
- Easy deployment with Vercel integration
-
Old School Meets New School: Ruby on Rails + React with Inertia.js
- No API layer needed, Inertia.js handles the bridge between Rails and React
- Rails comes "batteries included" with sensible defaults
- "Convention over configuration" nature of Rails means fewer technical choices to be made by the LLM
- LLMs converge faster on solutions due to Rails conventions
- Decades of training data for both Rails and React
- Ruby is clean and token-efficient for LLMs
- React gives you modern frontend capabilities that Rails lacks
- Ruby on Rails continues to position itself as the "One Person Framework"
Pro tip: Once you've completed your repository setup, save it as a GitHub template repository. You don't want to repeat this work for every new project.
Claude Code tip: Run /init as soon as the stack is in place. Claude inspects the repository and drafts a first CLAUDE.md from what is actually there. Trim it to commands, architecture, and hard rules. Commit the .claude/ folder (settings, rules, skills, agents) into the template repository too, so every new project starts with the same guardrails.
📝 Part 3: Writing Specifications
Alright, Claude Code is set up, your repository is set up. Now the real work starts.
This is where you MUST engage in a questioning process with the LLM before any code is written. Much of what follows applies to any AI coding tool.
Stop. Think. Then Build.
Just like good engineers pause to think before writing code, you should intentionally refrain from writing any code during this specification phase. Complex features always start with a good plain English description of what you're trying to accomplish. This specification process can take a bit of time and feel overkill but it's critical. You'll save countless hours down the line. I promise.
Intent is the Source of Truth
In lazy vibe coding, code becomes the source of truth. You iterate directly on code with the AI, tweaking and adjusting until something works, without clear intent documented anywhere. This is exactly what we want to avoid. Instead, intent should be your source of truth. Your specification determines what gets built. The code is generated from that intent, not the other way around. This is the core principle behind spec-driven development, where specifications become executable. The AI reads your intent and produces working code. When specifications are clear, you can iterate on implementations, try different technical approaches, or regenerate solutions without rewriting your requirements. The spec stays stable; the "how" can vary.
Why Vague Prompts Fail
Here's the reality: LLMs are exceptional at pattern completion, but not at mind reading. When you give a vague prompt like "add task assignment to my app," the AI has to guess at potentially thousands of unstated requirements. How do users select assignees? What permissions exist? Should there be notifications? What happens during reassignment? Every vague requirement multiplies possible interpretations exponentially. The AI will make some reasonable assumptions, and many will inevitably be wrong. You won't discover which ones until deep into implementation. Clear specifications reduce the solution space from thousands of possibilities to one clear path. That's why we specify first, then build.
The Specification Spectrum: Finding the Right Balance
Here's what I've learned: there's a spectrum between lazy prompting and full-blown specification documents. On one end, you have "build me a feature" with zero context—the AI fills in too many blanks with assumptions that don't match your needs. On the other end, you have complete Agile documentation with user stories, personas, epics, acceptance criteria for everything, and exhaustive data models that bloat your context window and cause "context rot."
Neither extreme works well with LLMs.
The sweet spot is somewhere in between: define sufficiently to provide the context required for the LLM, but not so much that you overwhelm it with irrelevant information. LLMs don't need to know about personas or business alignment the way human teams do. They need enough context to write good code, but not so much ceremony that the important details get lost in the noise.
Three methodologies have influenced my thinking here:
1. Linear's Approach - The issue tracking tool doesn't believe in user stories. They advocate for simply defining what you're building without the ceremony. Direct, clear, focused.
2. Jobs To Be Done (JTBD) - This framework emphasizes job stories over user stories. Job stories focus on what the feature does rather than who it's for. Knowing "who" it's for is a business question that helps humans align, but it's not necessarily relevant for writing good code.
3. Shape Up - From 37signals (creators of Basecamp and Ruby on Rails), this methodology introduces concepts like "no-gos" (explicit boundaries) and "rabbit holes" (risks to avoid). It's just as important to tell the LLM what NOT to do as it is to tell it what to do.
Two Ways LLMs Go Off the Rails:
-
They build functionalities you never asked for - Based on training data, they assume certain features should exist a certain way. If you're building a todo app, they might add categories, priorities, and due dates even if you just wanted a simple list.
-
They over-engineer the implementation - They reach for complex patterns, add unnecessary abstractions, or build elaborate systems when a simple solution would work.
The way to prevent this is with explicit no-gos and rabbit holes. Create guardrails by being clear about what you don't want: "Don't add authentication," "Don't create a separate API layer," "Keep the data model simple with just a single table."
Requirement Subtraction: Question Everything
Before diving into the workflow, I've found Elon Musk's first principle of engineering quite useful here: Make the requirements less dumb.
He famously said...
The requirements are definitely dumb; it does not matter who gave them to you. It's particularly dangerous if a smart person gave you the requirements, because you might not question them enough.
— Elon Musk —
His rule: If you're not occasionally adding things back in, you're not deleting enough.
(You can find the short video here)
When working with AI on specifications:
✅ Question every requirement - Does this feature actually solve the user's problem, or is it just "nice to have"?
✅ Kill scope aggressively - Remove features that don't directly serve your core value proposition
✅ Default to "no" - Every feature you add is code you must maintain, test, and debug
✅ Remove first, optimize later - Deletion is always faster and safer than building
Pro tip: During the Product Manager phase (covered below), explicitly ask: "What can we remove from this feature while still solving the core problem?". The best code is the code you never write. The best feature is the one you don't build because you found a simpler solution.
The Squad Approach
Instead of throwing vague feature requests at the AI and hoping for the best, we're going to use a structured, multi-agent workflow. Think of it as assembling a specialized team (similar to a squad in startups) where each AI agent plays a specific role:
- 📋 Product Manager
- 🎨 UX/UI Designer
- 🏗️ Software Architect
Squads are essentially small navy seal teams of domain experts that come together to ship features fast. That's exactly what you want with your vibe coding setup.
Each agent asks targeted questions in their domain, builds on the previous agent's work, and produces specific deliverables. By the end of this process, you'll have comprehensive specifications that any developer (human or AI) can implement with confidence.
Quick Start with Claude Code Plan Mode
Before diving into the comprehensive workflow below, Claude Code's Plan Mode provides a lightweight alternative to the detailed specification process outlined in this guide.
Plan Mode, activated with Shift + Tab, /plan, or claude --permission-mode plan, will:
- Research your codebase to find relevant files
- Ask clarifying questions about your requirements
- Generate a plan with file paths and code references
- Let you review the plan, keep planning with feedback, or edit it in your text editor with
Ctrl + G
When to Use Plan Mode vs. The Full Workflow:
Plan Mode is a good starting point if you want to move fast without investing much time in planning. However, it has limitations compared to the comprehensive approach I recommend:
- Limited questioning scope - Usually asks 4-5 questions instead of the more thorough exploration needed for complex features
- Mixed concerns - Combines behavioral and technical questions without separating UX/UI considerations
- Assumes more - Doesn't go through design details, technical choices, or non-functional requirements systematically
- No specialized expertise - Uses a single general agent rather than domain-specific Product Manager, UX/UI Designer, and Software Architect perspectives
Think of Plan Mode as a very lightweight version of the workflow below. For simple features or when you're just experimenting, Plan Mode works well. For complex features where quality, maintainability, and meeting precise requirements matter, I believe the workflow suggested below works best.
My recommendation: If you're new to vibe coding or working on a complex feature, start with Plan Mode to test the waters and get a feel for the questioning process. Then, when you're ready for higher quality specifications, adopt the comprehensive workflow below.
The Three-Agent Workflow
The specification process I recommend uses 3 specialized agents working sequentially:
- 📋 Product Manager - Defines WHAT to build and WHY
- 🎨 UX/UI Designer - Defines HOW users interact with it
- 🏗️ Software Architect - Defines HOW to build it technically
Each agent produces specific deliverables that the next agent builds upon.
Note: you are free to design your own workflow for your own needs. This 3 agent workflow simply follows how most squads tend to work within startups that ship fast.
Run the Three Agents as Claude Code Subagents
Claude Code has a native home for these roles: subagents. A subagent is a Markdown file in .claude/agents/ with a short YAML header and a system prompt as the body. Each one runs in its own context window, can use its own model, and only gets the tools you list.
name: product-manager description: Turn a feature request into a PRD with job stories, no-gos, rabbit holes, and acceptance criteria. Use before design or implementation of a non-trivial feature. model: sonnet tools: Read, Glob, Grep, Write
You are an expert Product Manager specializing in gathering requirements... (the full prompt from the templates)
The templates ship four of them: product-manager, ux-designer, software-architect, and tech-lead. Copy the agents/ folder into .claude/ and ask for them by name:
Use the product-manager subagent on @specifications/features/001-task-assignment/feature_request.md.
Ask me its questions first, then write the PRD to specifications/features/001-task-assignment/pm/.
Why this beats pasting prompts into the chat:
- Context isolation. The PM's twenty questions and the whole PRD draft stay in the subagent's window. Your main session receives one file, not a 2,000-line transcript.
- The right model per role. The architect runs on Opus because data-model mistakes are expensive. The PM and the designer run on Sonnet. Change one line to switch.
- Fewer tools, fewer accidents. None of the four can run shell commands or edit source code. They read the repository and write specification files.
- Claude can delegate on its own. When a request matches a subagent's description, Claude Code picks it without being told. Keep the descriptions specific so it picks the right one.
Skills and subagents are different things. A skill injects instructions into the current conversation. A subagent is a separate conversation with its own prompt and model. Use a skill for a procedure you run inside the current task (commit, review, audit). Use a subagent for a role that should think on its own (PM, designer, architect).
Complete Workflow Overview
Before we dive into the details of each agent, here's how the entire process flows:
Feature Request
     ↓
┌───────────────-─────────┐
│  📋 Product Manager     │
│  ────────────────────   │
│  • Ask strategic Qs     │
│  • Generate PRD         │
│  • Write job stories    │
│  • Define no-gos        │
│  • Identify rabbit holes│
│  • Edge case criteria   │
└──────────────-──────────┘
     ↓
┌────────────────────────┐
│  🎨 UX/UI Designer     │
│  ────────────────────  │
│  • Ask interaction Qs  │
│  • Breadboard flows    │
│  • Screen inventory    │
│  • ASCII wireframes    │
└────────────────────────┘
     ↓
┌────────────────────────┐
│  🏗️ Architect          │
│  ────────────────────  │
│  • Ask technical Qs    │
│  • Architecture spec   │
│  • Technology choices  │
│  • Implementation risks│
└────────────────────────┘
     ↓
Complete Specification
The Process:
-
📋 Product Manager asks strategic questions about business requirements, feature behavior, and edge cases. Then generates a Product Requirements Document (PRD) with job stories (not user stories), no-gos, rabbit holes, and acceptance criteria only for critical edge cases.
-
🎨 UX/UI Designer asks questions about user interactions, creates breadboards to map out flows at the right level of abstraction, builds a screen inventory (what to add/edit/delete), and produces ASCII wireframes when visual detail is needed.
-
🏗️ Software Architect asks technical questions about non-functional requirements, technical constraints, performance, security, and infrastructure. Creates a comprehensive architecture specification with technology recommendations and identifies implementation risks.
File Structure:
I recommend creating a specifications folder at the root of your project. This folder will contain all your prompts for all your agents (inside an agents folder, unless you use Claude Code skills) as well as all the outputs of your specs inside a features folder.
You can find an example of such folder (as I use it in my workflow) in the templates I provide here.
Here's a suggested structure you can adapt based on your preferences:
specifications/
├── agents/                          # Agent prompts (if not using Claude Code skills)
│   ├── product_manager.md
│   ├── ux_designer.md
│   └── architect.md
│
└── features/
    └── task-assignment/                      # One folder per feature
        ├── product_requirements_document.md  # Product specs (job stories, no-gos, rabbit holes, edge cases)
        ├── design_document.md                # Design specs (breadboards, screen inventory, flows)
        ├── architecture_document.md          # Technical specs (architecture, tech choices, risks)
        │
        ├── pm/
        │   └── pm_questions.json
        │
        ├── designer/
        │   ├── designer_questions.json
        │   └── wireframes/                   # ASCII wireframes (when needed)
        │       ├── task-list.txt
        │       └── assign-modal.txt
        │
        └── architect/
            └── architect_questions.json
Key Points:
- Each feature gets its own folder
- Three main documents: PRD (product), Design Doc (UX/UI), Architecture Doc (technical)
- Questions generated by LLMs and answered by the human (you) are saved as JSONs for reference
- Wireframes are separate files only when visual detail is needed
- All files are text-based (Markdown/JSON) for easy version control and LLM parsing
Phase 1: Product Manager
The Product Manager (PM) agent's job is to understand the what and why of the feature from a product perspective. This agent asks strategic questions about business requirements, user needs, and edge cases.
Step 1: Initial Questions
The PM starts by asking questions to understand:
- Core problem: What problem are we solving?
- Appetite: How much time is this worth? (Borrowed from Shape Up - sets time constraints upfront)
- Job to be done: What is the user trying to accomplish?
- Scope boundaries: What's in scope and what's explicitly out?
- Edge cases: What unusual scenarios need handling?
- Success criteria: How do we know this worked?
Example questions the PM might ask:
1. What problem does task assignment solve for your users?
2. How much time is this feature worth? (Small batch: 1-2 weeks, Big batch: 6 weeks)
3. When would a user need to assign a task to someone?
4. Can a task be assigned to multiple people?
5. What happens if you assign a task to someone who doesn't have access?
6. Should there be notifications when tasks are assigned/reassigned?
7. Can users reassign tasks, or only the original assignor?
8. What's explicitly NOT part of this feature? (e.g., no task ownership transfer, no delegation chains)
These questions force you to think through the feature systematically. The PM captures your answers and uses them to generate the specification.
Step 2: Generate Job Stories (Not User Stories)
Instead of traditional user stories with personas ("As a project manager, I want to..."), the PM generates job stories that focus on the situation, motivation, and outcome:
Format: When [situation], I want to [motivation], so I can [expected outcome].
Why job stories over user stories?
- They focus on what the feature does, not who it's for
- LLMs don't need personas or business context that's relevant for human alignment
- They're more direct and concrete for AI implementation
- Companies like Intercom and Basecamp successfully use this approach
Example job stories in the PRD:
Job Stories
JS-001: Assign task to team member
When I'm looking at a task that needs someone else to handle it I want to assign it to a team member So I can ensure they know it's their responsibility and I can track who's working on what
JS-002: Notification on assignment
When I assign a task to someone I want to them to receive a notification So they're immediately aware of their new responsibility
JS-003: View my assigned tasks
When I'm viewing my task list I want to see which tasks are assigned to me So I can know what I'm responsible for completing
These job stories drive the implementation without the ceremony of full user stories with acceptance criteria for every single interaction.
Step 3: Define No-Gos and Rabbit Holes
This is critical and often overlooked. The PM explicitly documents:
No-Gos: Features or functionality we're intentionally NOT building to fit the appetite and stay focused.
Rabbit Holes: Risks and implementation traps that could derail the project or cause over-engineering.
Example no-gos:
No-Gos
These are explicitly out of scope:
- No task ownership transfer (assigning doesn't transfer creation rights)
- No delegation chains (can't assign a task that's already assigned to you)
- No batch assignment (assign multiple tasks at once)
- No assignment history/audit log
- No "assign to team" (only to individuals)
Example rabbit holes:
Rabbit Holes
Watch out for these implementation traps:
-
Permission system complexity - Don't build a complex role-based permission system. Keep it simple: if you can see a task, you can assign it. More granular permissions are a v2 feature.
-
Real-time synchronization - Don't add websockets or real-time updates. Standard HTTP polling or page refresh is fine for v1.
-
Notification preferences - Don't build a notification preference system (email vs in-app vs both). Everyone gets email notifications, period. Preferences come later.
-
Assignment workflows - Don't create multi-step assignment workflows (request → approve → assign). Direct assignment only.
-
Data model over-engineering - Don't create separate tables for assignments, assigners, assignment history. Just add an
assigned_tofield to the tasks table.
By explicitly stating these boundaries and risks, you prevent the LLM from going down paths that waste time or add unnecessary complexity.
Step 4: Acceptance Criteria (Only for Critical Edge Cases)
Unlike traditional Agile where you write acceptance criteria for everything, we only document criteria for critical, non-obvious edge cases that could cause problems if implemented wrong.
These are typically:
- Payment/billing logic
- Security flows
- Data integrity issues
- Complex state transitions
When to write acceptance criteria:
- ✅ Does failure cost money? (payments, billing, refunds)
- ✅ Does failure lock someone out? (authentication, authorization)
- ✅ Does failure lose data? (exports, backups, critical writes)
- ✅ Does failure break integrations? (API calls, webhooks)
- ❌ Simple UI interactions (these don't need criteria)
Example acceptance criteria using Given/When/Then (Gherkin syntax):
Scenario: Cannot assign task to user outside project
  Given I have a task in "Project Alpha"
  And user "john@example.com" is not a member of "Project Alpha"
  When I attempt to assign the task to "john@example.com"
  Then the assignment fails
  And I see an error: "Cannot assign to users outside this project"
  And the task remains unassigned

Scenario: Reassignment notifies new assignee only
  Given task #123 is assigned to "alice@example.com"
  When I reassign task #123 to "bob@example.com"
  Then "bob@example.com" receives an assignment notification
  And "alice@example.com" receives a notification that task was reassigned
  And the previous assignee "alice@example.com" is recorded in the task
These acceptance criteria translate directly into test cases, which is why we use Given/When/Then format (it maps to Behavior Driven Development and the Gherkin language).
Deliverables:
pm_questions.json- Questions and your answers (saved in pm/ folder)product_requirements_document.md- Contains problem statement, appetite, job stories, no-gos, rabbit holes, and edge case acceptance criteria (in feature root folder)
Phase 2: UX/UI Designer
The Designer agent focuses on the how of user interaction. This agent asks questions about screens, flows, and interactions, then creates breadboards and wireframes.
Step 1: Designer Questions
The designer asks questions to understand:
- User flows: How do users move through this feature?
- Screen modifications: What existing screens need changes?
- New screens: What needs to be built from scratch?
- Interactions: What can users do on each screen?
- States: What different states does the UI have? (loading, error, success, empty)
Example questions:
1. Where in the existing UI does task assignment happen?
2. Is assignment inline on the task list, or in a modal/separate page?
3. How does the user select who to assign to? (dropdown, autocomplete, modal with search?)
4. Should assigned tasks look visually different from unassigned ones?
5. Where do users see tasks assigned to them?
6. What happens visually when assignment succeeds? (toast notification, visual update?)
7. How are assignment errors displayed to the user?
Step 2: Breadboarding (Shape Up Technique)
Before diving into visual details, use breadboarding borrowed from electrical engineering. An electrical breadboard has all the components and wiring of a real device but no industrial design. Similarly, sketch out your interface with words first, not pictures.
A software breadboard has three key components:
- Places - Locations users navigate to (screens, dialogs, modals, menus)
- Affordances - Things users can interact with (buttons, fields, links, dropdowns)
- Connection lines - How affordances move users between places
Why breadboard first?
- Stays at the right level of abstraction (concrete but not detailed)
- Prevents premature design decisions
- Lets you think about logic and flow without visual distractions
- Gives the LLM clear structure without over-constraining design choices
Example breadboard in the design document:
Task Assignment Flow - Breadboard
[Task List Page]
- Each task shows:
- Task title
- Current assignee (if any)
- "Assign" button
- "Assign" button → [Assignment Modal]
[Assignment Modal]
- User search/select dropdown
- Current assignee display (if exists)
- "Assign" button → [Task List Page] (with success toast)
- "Cancel" link → [Task List Page]
[Task List Page - After Assignment]
- Shows success toast: "Task assigned to [name]"
- Updated task shows new assignee
- Auto-dismisses after 3 seconds
[Error States]
- Invalid user → Show error in modal: "User not found"
- Permission denied → Show error in modal: "You don't have permission to assign"
- Network failure → Show error in modal: "Assignment failed. Try again."
This breadboard captures the complete flow without making decisions about colors, exact positioning, typography, or detailed layouts. The LLM understands what needs to exist and how it connects.
Step 3: Screen Inventory
Create an inventory of what screens/components need to be created, modified, or deleted:
Example screen inventory in the design document:
Screen Inventory
New Screens
Assignment Modal
- Modal dialog for assigning tasks to team members
- Wireframe:
wireframes/assignment-modal.txt
Modified Screens
Task List Page
- Changes: Add 'Assign' button to each task, display current assignee
- Wireframe:
wireframes/task-list-updated.txt
Task Detail Page
- Changes: Show assignee info, add inline assign/reassign option
- Wireframe:
wireframes/task-detail-updated.txt
Deleted Screens
None
Step 4: ASCII Wireframes (When Needed)
After breadboarding, if you need to get more specific about layouts, create ASCII wireframes. These are text-based layouts that:
- LLMs can easily parse and reference
- Use fewer tokens than visual formats
- Let you iterate in seconds
- Provide just enough visual detail without over-constraining
Use ASCII wireframes for screens where layout matters, but skip them when the breadboard is clear enough.
This aligns with the "fat marker sketch" concept from Shape Up: broad enough that adding excessive detail is difficult.
Example ASCII wireframe:
┌─────────────────────────────────────────────┐
│  [X]                Task Assignment         │
│                                             │
│  Assign task: "Fix login bug"               │
│  ─────────────────────────────              │
│                                             │
│  Currently assigned to: Alice Johnson       │
│                                             │
│  Assign to:                                 │
│  ┌─────────────────────────────────────┐    │
│  │ Bob Smith ▼                         │    │
│  └─────────────────────────────────────┘    │
│                                             │
│  Recent assignees:                          │
│  • Bob Smith                                │
│  • Carol White                              │
│  • David Lee                                │
│                                             │
│  [Assign Task]  [Cancel]                    │
│                                             │
└─────────────────────────────────────────────┘
Pro tip: Only create wireframes when layout decisions actually matter. Don't wireframe every single screen—trust the breadboards for simple screens and only add visual detail where it's critical to understanding.
Deliverables:
designer_questions.json- Questions and answers (saved in designer/ folder)design_document.md- Contains breadboards, screen inventory, and references to wireframes (in feature root folder)- ASCII wireframes in
wireframes/folder (only when visual detail is needed)
Phase 3: Software Architect
The Architect agent focuses on the how of technical implementation. This agent asks questions about architecture, technology choices, and non-functional requirements.
Step 1: Technical Questions
The architect asks questions to understand:
- Data model: What tables/collections/entities are needed?
- API design: What endpoints are required?
- Performance: Are there scalability concerns?
- Security: What security considerations exist?
- Integration: How does this interact with existing systems?
- Non-functional requirements: Reliability, monitoring, error handling
Example questions:
1. Where should assignment data be stored? (Add field to tasks table or separate assignments table?)
2. Should we support assigning tasks to deleted/inactive users?
3. What's the expected assignment volume? (impacts whether we need optimization)
4. Should assignment be idempotent? (can you assign the same person twice?)
5. How should we handle notifications? (synchronous or async queue?)
6. Do we need to track assignment history for analytics?
7. What existing authentication/authorization system should we integrate with?
8. Should the API support batch assignments for future use?
Step 2: Architecture Specification
The architect creates a comprehensive specification covering:
Data Model:
Data Model Changes
tasks table (modify)
Add columns:
assigned_to(uuid, nullable, foreign key to users.id)assigned_at(timestamp, nullable)assigned_by(uuid, nullable, foreign key to users.id)
Indexes:
idx_tasks_assigned_toon assigned_to (for filtering user's tasks)idx_tasks_assigned_aton assigned_at (for sorting by assignment date)
No separate assignments table needed for v1. Keep it simple.
API Endpoints:
API Endpoints
POST /api/tasks/:id/assign
Assigns a task to a user.
Request: { "assigned_to": "user-uuid" }
Response (200 OK): { "task_id": "task-uuid", "assigned_to": "user-uuid", "assigned_at": "2024-01-15T10:30:00Z" }
Errors:
- 404: Task not found
- 403: User doesn't have permission to assign
- 400: Assigned user not in project
Technology Choices in the architecture document:
The architect presents options for key technical decisions in simple markdown format:
Technology Choices
Email Notifications
We need to send email notifications when tasks are assigned.
Option 1: SendGrid (Recommended) ✓
- ✅ Easy setup with good documentation
- ✅ 60-day free trial (100 emails/day)
- ✅ Good deliverability rates
- ✅ Simple API
- ❌ Requires a paid plan after the trial
- Decision: Good enough for v1. We can switch later if needed.
Option 2: AWS SES
- ✅ Very cheap ($0.10 per 1,000 emails)
- ✅ Scales infinitely
- ✅ Integrates with existing AWS infrastructure
- ❌ More complex setup (domain verification, DKIM, etc.)
- ❌ Requires dealing with AWS console complexity
- Decision: Skip for v1. Not worth the setup time.
Option 3: Postmark
- ✅ Great deliverability
- ✅ Clean API
- ❌ More expensive than SendGrid
- ❌ Smaller free tier
- Decision: Not needed. SendGrid is sufficient.
Final choice: Start with SendGrid. It's simple, well-documented, and we can always migrate to SES if email volume becomes expensive.
Notification Delivery
How should we send notifications?
Option 1: Synchronous (Recommended for v1) ✓
- ✅ Simple implementation
- ✅ Immediate feedback if email fails
- ✅ No queue infrastructure needed
- ❌ Slightly slower API response (adds ~200ms)
- ❌ Won't scale to thousands of notifications
- Decision: Good enough for v1. Most assignment operations are infrequent.
Option 2: Background Queue (Redis/BullMQ)
- ✅ Fast API response
- ✅ Handles bursts better
- ✅ Can retry failures
- ❌ Adds infrastructure complexity (Redis, worker processes)
- ❌ Harder to debug
- ❌ Overkill for current volume
- Decision: Wait until we actually need it. Don't over-engineer.
Final choice: Synchronous for v1. Send emails directly in the API handler. If response times become a problem, we'll add a queue in v2.
The important technical choices usually fall into two categories:
- Libraries/SDKs - Services you will install on your codebase (e.g.,
@sendgrid/mail,axios) - Third-party APIs - HTTP endpoints you call directly (e.g. Stripe API, Supabase REST API)
Pro tip: Use Reddit & Hacker News as Your BS Detectors
When the AI suggests libraries or tools, validate them on Reddit or Hacker News before committing:
Search: [tool name] reddit or [tool name] hacker news or [tool name] vs [alternative] reddit
Why these platforms? Anonymity breeds honesty. Developers on Reddit and Hacker News will tell you the unvarnished truth, the hidden gotchas, maintenance issues, and better alternatives. If a library has been abandoned for 2 years or has terrible developer experience, these communities will let you know. The AI might suggest something that technically works but is practically unusable.
PS: Avoid LinkedIn for technical validation. It's the worst place to search for honest tool reviews, everyone's polishing their professional image, promoting their company's tools, or building their personal brand. You won't find the brutal truth there.
Quick validation questions to check:
- Is this tool actively maintained?
- Does it involve trade-offs we are willing to accept?
- Does it lack certain functionalities?
- What are the costs associated with that library or API?
Step 3: Implementation Risks
The architect identifies technical rabbit holes and implementation risks:
Implementation Risks
1. Race conditions on concurrent assignments
- Risk: Two users assign the same task simultaneously
- Mitigation: Use database-level locking or last-write-wins (simpler for v1)
- Decision: Last-write-wins is fine. Concurrent assignment is rare.
2. Email delivery failures
- Risk: Email fails but API returns success
- Mitigation: Wrap email sending in try-catch, log failures
- Decision: Log email failures but don't block assignment. User still sees success in UI.
3. N+1 queries when loading task lists
- Risk: Fetching assignee data for each task separately
- Mitigation: Use JOIN or eager loading to fetch assignees in one query
- Decision: Must implement from the start. This is easy to get right now.
Deliverables:
architect_questions.json- Technical questions and answers (saved in architect/ folder)architecture_document.md- Contains architecture spec, technology choices, and implementation risks (in feature root folder)
🔄 Using Specifications with Claude Code
Once you have these specifications, implementation in Claude Code becomes straightforward. You have three main documents that serve as your source of truth:
- product_requirements_document.md - Product specs (what and why)
- design_document.md - Design specs (how users interact)
- architecture_document.md - Technical specs (how to build)
-
Load the context: Add relevant spec files to your Claude Code prompt using
@filename- Include the PRD for understanding the feature requirements
- Include the design document for UI/UX work
- Include the architecture document for technical implementation
-
Reference specific sections: Point Claude Code to exact requirements
@architecture_document.md Implement the task assignment endpoint according to the specifications in the "API Endpoints" section -
Use acceptance criteria for testing:
@product_requirements_document.md Create tests for the edge cases defined in the "Acceptance Criteria" section -
Keep specs updated: As you discover edge cases during implementation, update the relevant document
- New edge cases → Update PRD
- UI changes → Update design document
- Tech stack changes → Update architecture document
Note on Context Engineering: These specification documents become a core part of your context engineering strategy (covered in Part 5). By referencing them with @filename during implementation, you provide the AI with clear, structured intent rather than relying on conversation history alone. This ensures the AI has the right context at the right time, making implementations more accurate and reducing back-and-forth.
Key Benefits of This Approach
Clarity: Everyone (human and AI) knows exactly what to build
Completeness: All three perspectives (business logic, UX/UI, technical architecture) are covered
Traceability: Every implementation decision traces back to a specification
Reusability: Specs become documentation and onboarding material
Faster Implementation: Less back-and-forth during coding because requirements are clear
Better Testing: Acceptance criteria for edge cases map directly to test cases
Scope Control: No-gos and rabbit holes prevent feature creep and over-engineering
When to Use This Workflow
This comprehensive three-agent workflow works best when working on complex features.
For quick UI edits or small improvements on existing features, you probably don't need this full process, it's likely overkill. Use default vibe coding or Claude Code's Plan Mode instead.
The key is finding the right balance on the specification spectrum for your specific feature. Simple feature? Lighter specs. Complex feature with many edge cases? Full workflow.
Templates and Prompts
All the agent prompts, templates, and examples are available in the templates. The folder structure is organized as follows:
Main Agent Prompts (/agent_prompts/):
- Product Manager prompt (updated with job stories, no-gos, rabbit holes)
- UX/UI Designer prompt (with breadboarding and screen inventory concepts)
- Software Architect prompt (with technology choices and implementation risks)
- Tech Lead prompt (for task breakdown)
Specialized Prompts (/special_prompts/):
- Debugging agent prompt (for complex debugging scenarios)
- UX/UI expert prompt (for specialized design assistance)
Example Feature (/features_example/001-collaborative-task-assignment/):
- Complete three-agent workflow example
- Organized by role:
pm/,ux/,architect/,tasks/ - Product Requirements Document, Design Document, Architecture Document
- ASCII wireframe examples
- Task breakdown example
Drop these into your project and feel free to customize them for your specific needs.
Next up: Now that you have comprehensive specifications, Part 4 covers how to break them down into manageable implementation tasks. It is the last step before we can actually start writing code!
✂️ Part 4: Task Breakdown
This is a critical step you should not skip. If you've done all that hard work specifying your feature, it would be a shame to mess it up during the implementation phase.
The Problem with One-Shot Development
When you've written comprehensive specifications (like we did in Parts 3), you're dealing with complex features that shouldn't be built all at once. Asking an AI to implement everything in one go is like building your dream house and having the foundation crew, painters, and roofers all working on the same site simultaneously. It's chaotic and counterproductive. You need to build the foundation first, then the walls, then the roof, and so on.
The Tech Lead's role here is to transform our detailed specifications into bite-sized, actionable tasks that can be validated at each step by you, the human.
Two Approaches: TaskMaster vs Custom System
Option 1: TaskMaster
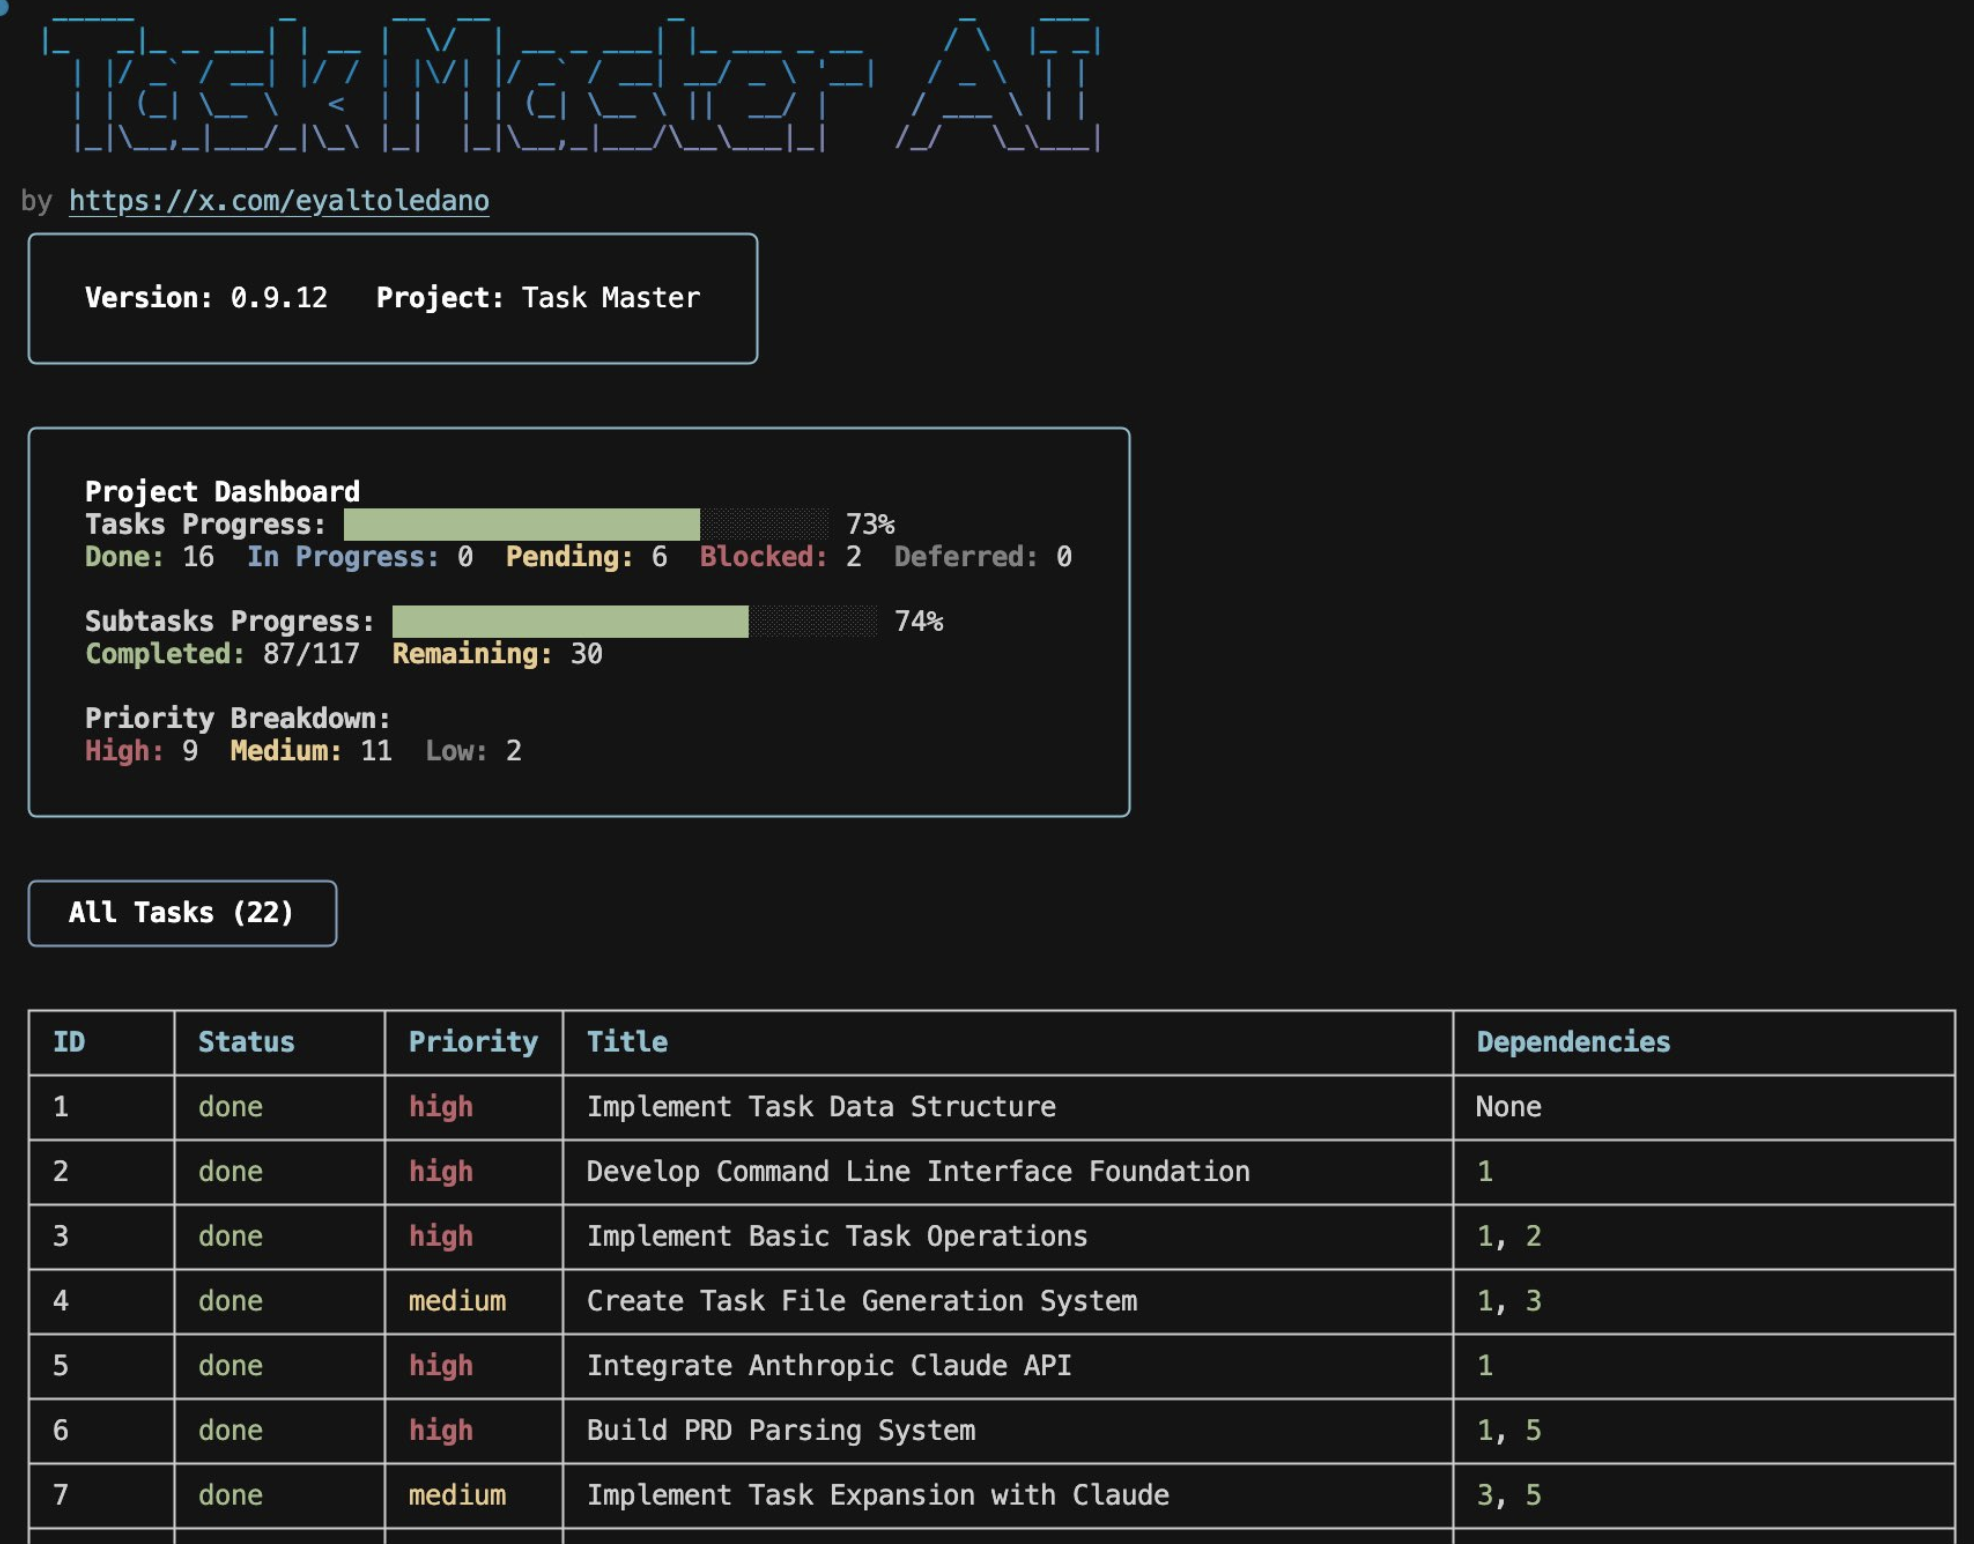
TaskMaster is an open-source project that automates task generation from Product Requirement Documents. It includes an MCP server that allows you to simply call "next step" or "next task" and it automatically knows what to work on next. I've used it extensively. It's effective and handles the complexity of task orchestration for you.
Option 2: Build Your Own System
You can create a simplified version, which uses a prompt-based approach. The templates I provide includes a Tech Lead agent prompt that breaks down specifications into specific, testable tasks.
Going DIY: A Simplified version of TaskMaster
For those who want to build their own system but need the core components, I provide a simplified version inspired by TaskMaster's architecture. This gives you the essential structure without the full complexity of their system. You can start with that and move to TaskMaster if you feel the need for something more sophisticated.
The Three Core Components
1. Tech Lead Prompt (agent_prompts/tech_lead_prompt.md, also the tech-lead subagent)
- Located in the templates
/agent_prompts/folder, and packaged as.claude/agents/tech-lead.mdso you can say "use the tech-lead subagent on these specs" - Acts as the "brain" that analyzes your specifications
- Breaks down complex features into manageable tasks
- Handles dependency mapping and risk assessment
- Can be customized for your specific domain or tech stack
2. Task Overview Structure (tasks/task.json)
- Single source of truth for all project tasks
- Contains the same structure as TaskMaster's
tasks.json
📋 Click to see example task.json structure
{
  "meta": {
    "projectName": "Your Project",
    "version": "1.0.0",
    "createdAt": "timestamp"
  },
  "tasks": [
    {
      "id": 1,
      "title": "Setup Database Schema",
      "description": "Create initial database tables and relationships",
      "status": "pending",
      "dependencies": [],
      "priority": "high",
      "complexity": 6,
      "subtasks": [],
      "testStrategy": "Verify schema with sample data",
      "tags": ["database", "foundation"]
    }
  ]
}
3. Individual Task Breakdowns (tasks/[task-id].md)
- Each task gets its own detailed markdown file
- Contains step-by-step implementation instructions
- Includes acceptance criteria and testing guidelines
- Follows the same format as TaskMaster but simplified
📝 Click to see example task breakdown
Task 1: Setup Database Schema
Overview
Create the foundational database structure for the user management system.
Steps
- Create users table with email, password_hash, created_at
- Create sessions table with user_id, token, expires_at
- Add foreign key constraints
- Create indexes for performance
Acceptance Criteria
- Users table created with all required fields
- Sessions table properly linked to users
- All constraints and indexes applied
- Sample data can be inserted successfully
Testing Strategy
Run migration script and verify with sample data insertion.
How It Works Together
- Input: Your comprehensive specifications (PRD, design document, architecture document)
- Processing: The Tech Lead prompt analyzes everything and generates structured tasks
- Output:
tasks/task.jsonwith the complete task overview- Individual
tasks/[id].mdfiles for each task's detailed breakdown
- Implementation: You work through tasks in dependency order, marking them complete as you go
The Claude Code loop for each task:
/clear
@tasks/004.md
Implement this task. Start in plan mode and show me the plan before you edit anything.
Keep the tests passing. When you are done, list any human action required.
Then /review-and-commit, test on localhost, and start the next task with a fresh /clear. One task per context window keeps the agent focused, keeps /compact rare, and makes /rewind useful when a task goes sideways.
This simplified approach gives you 80% of TaskMaster's benefits with 20% of the complexity, perfect for teams who want systematic task breakdown without having to install and learn a new tool.
The Two-Axis Breakdown Strategy
The Tech Lead agent breaks down scope across two critical axes:
1. Behavior Axis: Don't implement all user behavior at once
- Start with core user flows
- Add edge cases incrementally
- Build validation step by step
2. System Axis: Follow the natural development progression
- Data Model → Backend Logic → Frontend Components → UX Polish
- Each layer builds on the previous one
- Dependencies are clear and manageable
The Human-in-the-Loop Advantage
Here's where the magic happens. After each task completion, you can:
- Spin up
localhostand test the current milestone - Validate the implementation matches your expectations
- Catch issues early before they compound
- Course-correct immediately if something feels off
This prevents the nightmare scenario where the AI builds everything and you discover fundamental problems at the end. If the data model is wrong, you catch it after the first task, not 20 tasks later when it's already connected to your UI and you now have to untangle an absolute mess.
Why This Matters for Complex Features
If a feature is simple enough to implement in one shot, you probably don't need all these specifications. But if it's complex enough to require detailed PRDs, user stories, and technical architecture, then it's definitely complex enough to benefit from systematic task breakdown.
The goal is creating testable milestones where you can bring human judgment into the loop and ensure the AI stays on track.
🧩 Part 5: Context Window
Finally!
We now move into the implementation phase. We have great specifications, clear requirements, and a solid breakdown of how to build our feature. The AI model is ready to start working on the code.
Good specifications and detailed breakdowns are essential for good implementation, but there's a third element that really matters: context engineering aka how you manage what information the AI actually sees when it's working.
Context Window Management
Two key aspects affect context engineering when vibe coding:
Quantity (How Much Context)
The amount of content you provide matters. Breaking down tasks specifically should already help with this, but you need to be deliberate about what to include.
Here's a practical rule of thumb for Claude Code's context window:
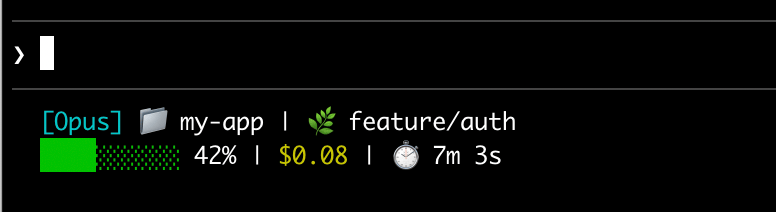 Keep context usage visible in the Claude Code status line
Run /context to see exactly what is consuming space. You can also configure /statusline to keep the context percentage visible at all times.
When the context window starts filling up, you have three options:
- Use
/clearfor a new task - This gives unrelated work a clean context window - Use
/compactfor the same task - This summarizes the conversation while preserving the important state - Use a subagent for noisy research - Large file reads stay inside the subagent's separate context; only its summary returns to the main session
You can tell Claude what to preserve: /compact focus on code changes, failed tests, and unresolved decisions. Claude Code also compacts automatically near the context limit, but deliberate compaction gives you more control.
Pro tip: Use one named session per workstream. Run /rename oauth-migration, use /clear when you switch to unrelated work, and return later with /resume. Treat sessions like branches for context.
Quality (How Good the Context Is)
Quality matters just as much as quantity. Outdated or poorly formatted context can actually confuse your LLM, in just the same way it would confuse a developer.
Here's the tricky part about bad context: the AI won't tell you it's working with outdated or wrong information. It will confidently generate code based on whatever you give it. Bad context doesn't lead to "I don't know" responses—it leads to confident but wrong solutions that waste your time debugging.
The Two Areas of Context
The context provided to the model consists of two main parts:
1. Existing Codebase (Already Handled)
Claude Code searches your repository directly with tools such as Glob, Grep, Read, Git, and language servers. It can usually find:
- The right files to edit
- Related components and dependencies
- Existing patterns and conventions
- Code that needs to be updated or removed
You do not need to paste entire folders into the prompt. Give Claude a clear objective and let it investigate. For large or unfamiliar repositories, ask it to map the relevant area first in Plan Mode. You can also delegate broad research to a subagent so its file reads do not pollute the main context.
2. External Context (Your Responsibility)
This is where you need to be deliberate about what context you provide. External context breaks down into three critical types:
- Documentation - Latest API docs, library documentation, and framework guides
- Logs - Console logs, server logs, and error stack traces
- Visual Feedback - Screenshots, recordings, and visual context for UX/UI work
In order to provide such external context, we're going to use the infamous MCP servers (Model Context Protocol).
Understanding MCP
Before we dive into the different types of external context, it's important to understand MCP (Model Context Protocol). Invented by Anthropic, MCP is a standard way for AI coding assistants to connect with external tools and data sources. Think of MCP servers as bridges that allow your AI to access real-time information, interact with browsers, scrape websites, and perform automated tasks that weren't possible before.
MCP has quickly become the standard for extending AI capabilities, but with thousands of MCP servers now available, it's easy to get overwhelmed.
For each use case, I only recommend a handful of MCP servers. Just pick one. Rather than having 50 MCP servers installed, you'll have a much better workflow with a handful of high-quality, thoroughly tested tools that get the job done really well. The MCP servers I recommend below are the ones I've extensively tested and can confidently recommend for production use.
Let's explore each of these in detail:
📚 Documentation (Keep it Current)
Why it matters: Your model's training cutoff might not include the latest documentation for your stack. Having current API docs, library documentation, and framework guides is crucial.
Best practices:
- Reference the latest version of your framework's documentation
- Include specific API endpoints and their current parameters
- Pull in migration guides when working with framework updates
- Use MCP servers to fetch real-time documentation
Adding Framework Documentation to Claude Code
Claude Code does not have a documentation indexing panel. It has three better-targeted options:
- Use built-in web tools for one-off questions. Ask Claude to read the current official documentation before it implements a feature.
- Use a documentation MCP for repeated lookups. Context7 is a good default for popular libraries.
- Create a skill for private or project-specific documentation. The skill body loads only when Claude uses it, so it does not fill every session with reference material.
Example prompt:
Read the current official Next.js documentation for Server Actions.
Then inspect this repository and propose an implementation that follows
our existing patterns. Cite the documentation links you used.
Manage MCP connections with claude mcp or /mcp. Keep documentation servers disabled when you do not need them. Claude Code defers most MCP schemas until a tool is used, but unused tools still add noise.
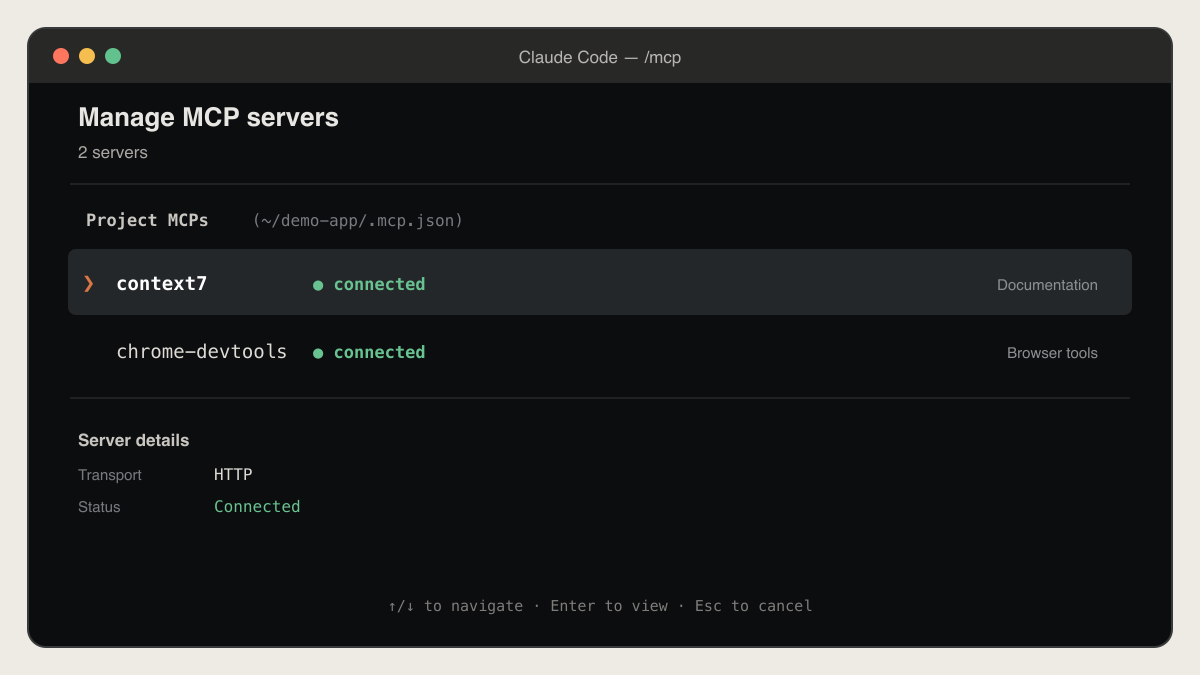 Manage documentation and other MCP servers with /mcp
If one framework controls most of your project, add a short rule that tells Claude where to get the authoritative documentation. Do not copy an entire documentation site into CLAUDE.md.
Example for a typical stack: If you're using Next.js + React + Supabase + Tailwind CSS + shadcn/ui, configure one good documentation source and tell Claude to prefer official docs. You do not need five separate MCP servers. Context quality matters more than tool count.
Pro tip: Learning from Open Source Projects
When building a feature inspired by an open-source project, use Gitingest to turn any GitHub repository into a prompt-friendly text digest that Claude Code can reference. This is incredibly helpful for understanding architectural decisions and implementation patterns from projects you admire.
Use case: You see a feature you like in an open-source tool (e.g., Excalidraw's canvas interaction, FastAPI's routing pattern) and want to replicate it in your project. Instead of manually browsing the repository:
- Go to Gitingest and paste the repository URL (or replace 'hub' with 'ingest' in any GitHub URL)
- It generates a text digest of the entire codebase
- Save it as a file to reference it in Claude Code
- The LLM can now understand how they implemented the feature and suggest the best architecture for your use case
For a more powerful approach, you can turn any GitHub repository or documentation site into a dedicated MCP server using GitMCP. This gives your AI assistant persistent, contextual access to the entire codebase.
This is especially powerful when you're frequently referencing a specific framework or library, as the AI can pull context from the source code directly without you needing to manually copy and paste sections.
This dramatically speeds up learning from existing codebases and helps your AI assistant provide better architectural recommendations based on proven patterns.
Recommended MCPs for Additional Documentation:
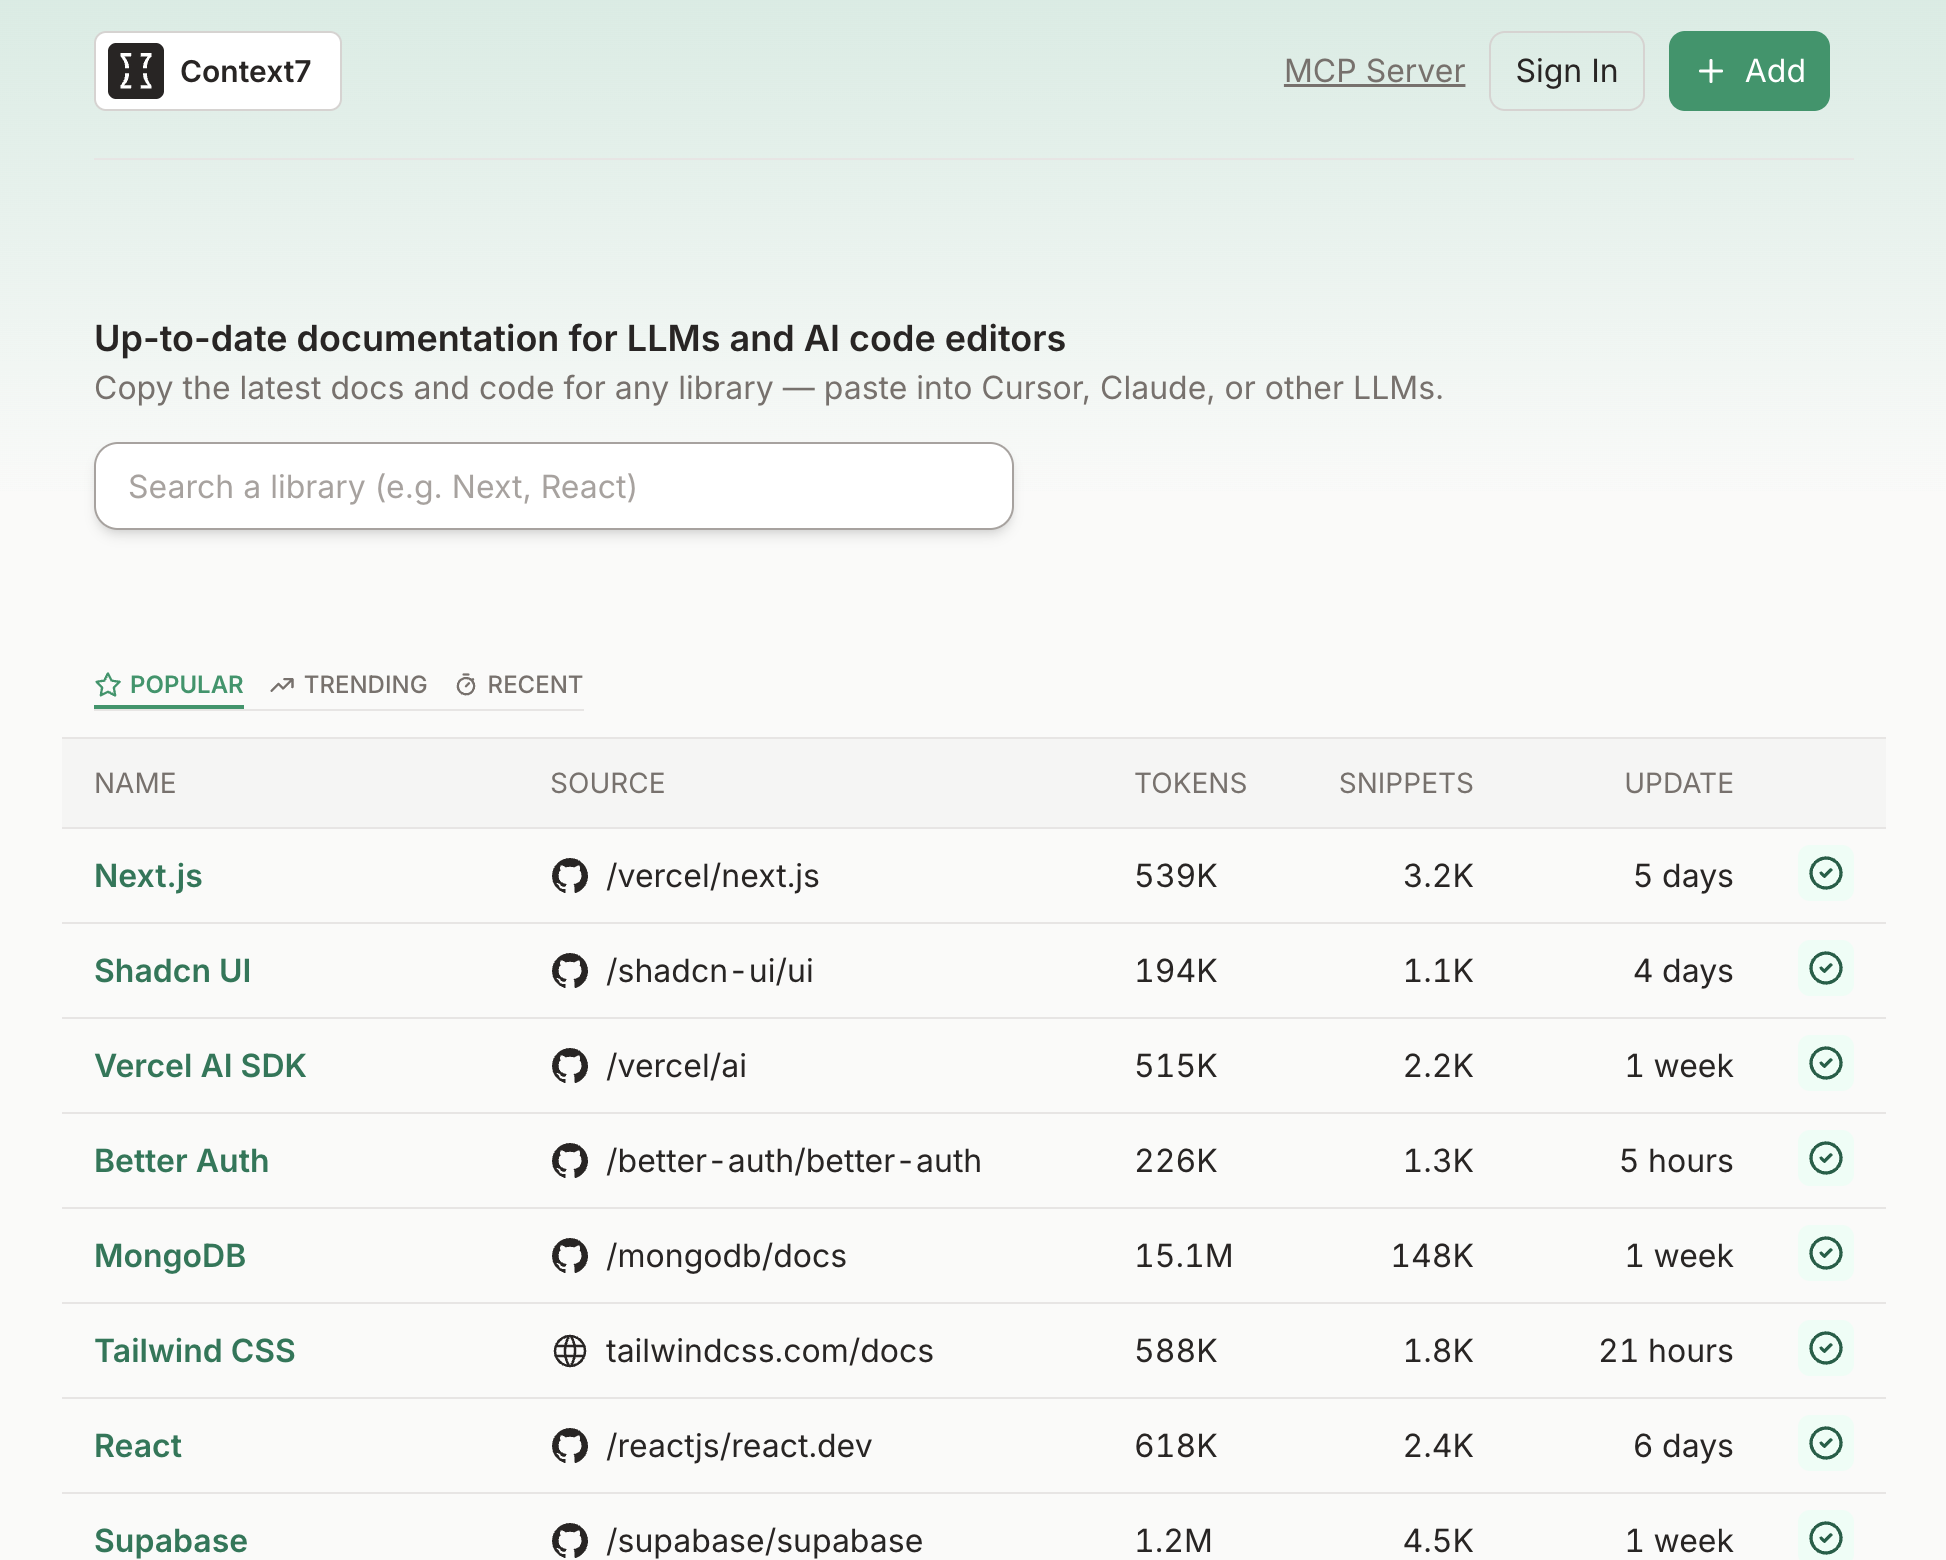
🏆 Context7
For fetching up-to-date library and API documentations. See their (MCP Server)
🏆 FireCrawl
For scraping and extracting content from documentation websites. See their (MCP Server)
🏆 Crawl4AI
A fully open-source LLM-friendly web crawler and scraper for advanced data extraction. Unlike Context7 or FireCrawl, Crawl4AI gives you complete control and customization but requires significantly more setup and technical knowledge. Perfect for developers who want to self-host their crawling infrastructure or need advanced extraction capabilities. Check their documentation to learn how to integrate it as an MCP server.
Note: This option is recommended for teams with technical expertise who value full control and customization over ease of use.
🏆 Linkup
For real-time web search and accessing the latest documentation. Linkup says its search endpoint ranks #1 among sub-second web search APIs on Verified SimpleQA, with structured responses and source attribution. See their official MCP server.
🏆 Perplexity MCP
For AI-powered search with cited sources. Perplexity excels at answering technical questions with source attribution, making it ideal for finding current best practices, comparing libraries, or researching implementation approaches when documentation alone isn't enough.
🔍 Logs (Show the Symptoms)
Why it matters: When debugging, the AI needs to see the actual error messages, stack traces, and console output to understand what's going wrong.
Best practices:
- Share both frontend console logs and server logs
- Include the full error stack trace
- Show network request/response details when relevant
- Capture logs at the moment the issue occurs
Recommended MCPs for Logs:
🏆 Claude in Chrome
This is the simplest option if you use a direct Claude plan. Start Claude Code with claude --chrome or connect it with /chrome. Claude can open your local app in a visible Chrome window, read console errors and DOM state, inspect authenticated flows, and fix the code in the same session.
It uses your existing browser login state. When it reaches a CAPTCHA or a sensitive login step, it pauses and asks you to take over.
🏆 Chrome DevTools MCP
For comprehensive browser debugging, performance analysis, and automated testing. Provides direct access to Chrome DevTools capabilities including console logs, network requests, performance traces, and browser automation. Essential for debugging frontend issues, analyzing performance bottlenecks, and testing user interactions. The good part: it is maintained by Google and the Chrome DevTools team.
🏆 Playwright MCP
For comprehensive browser automation and end-to-end testing. Particularly powerful when you need to test specific user flows and navigate through your application to verify functionality. Allows you to automate complex user interactions, form submissions, and multi-step workflows. Essential for validating complete user journeys and ensuring your application works as expected from a user's perspective. The good part: it is maintained by Microsoft.
🏆 Browser MCP
For browser automation using your actual logged-in browser sessions. Unlike Playwright which launches fresh instances, Browser MCP connects to your existing Chrome browser via an extension. This means the AI can navigate websites where you're already logged in, avoiding bot detection and CAPTCHAs. Perfect for testing authenticated user flows or debugging issues that only appear when logged in.
❌ Browser Tools (Not recommended anymore)
I used to recommend this tool, but with Chrome DevTools MCP now available, it no longer makes sense. There are two main issues:
- You have to download a Chrome extension that is not verified by the Chrome store for it to work.
- It doesn't seem to be maintained anymore; it's been many months since the project was last updated.
🎨 Design (Give it Eyes)
When building products, you'll encounter design needs across five main categories. Each requires different tools and approaches. Here are the top recommended MCPs for each category based on extensive testing.
The Five Categories of Design Needs
When working on UX/UI, you typically need help with:
- UI Components - Buttons, forms, layouts, and interactive elements
- Illustrations - Custom graphics, empty states, loading states, onboarding visuals
- Images - Generated images, backgrounds, hero sections
- Icons - Interface icons, feature icons, navigation elements
- Visual Feedback - Annotations, UI reviews, and bulk feedback on existing interfaces
Let's cover the best MCPs and approaches for each:
1. 🧩 UI Components
When building interfaces, you need design inspiration and pre-built components that match modern UI patterns.
Recommended MCPs:
🏆 Magic UI MCP (If using Magic UI library)
If you're already using Magic UI as your component library, their MCP provides direct access to their component ecosystem. Ideal for teams committed to the Magic UI design system.
🏆 Magic MCP from 21st.dev (Library Agnostic - Recommended)
This is the most versatile option for UI component generation. Magic MCP is library-agnostic, meaning it works with any UI framework you're using (shadcn/ui, Material-UI, Chakra UI, etc.).
When to use it:
- Designing landing pages and need inspiration for hero sections, pricing tables, or feature grids
- Building product interfaces and want modern UI patterns for dashboards, forms, or modals
- Need quick component iterations without leaving Claude Code
- Want to explore different UI approaches before committing to a design
Why it's powerful: It's like having v0.dev directly in your Claude Code workflow, generating production-ready React components that integrate with your existing codebase.
Pro tip: When Words Fail, Show Don't Tell
Sometimes you know exactly what design you want but struggle to describe it. Instead of fighting with prompts, use these resources:
Design Inspiration (screenshot and reference them in Claude Code):
- Dribbble - High-quality UI designs from professional designers
- Mobbin - Real mobile and web app screenshots from popular products
Workflow: Find a design you like, save a screenshot in the repository or drag it into the Claude Code interface, and say "Make this section look like this design while preserving our style and aesthetics." A picture speaks a thousand words. This is especially powerful for landing pages, pricing tables, dashboard layouts, and complex UI patterns where describing every detail would take paragraphs.
UI Component Libraries (AI can directly access and use):
- Kibo UI - High-quality shadcn/ui components (41 components, 6 blocks, 1101+ patterns). Free and open source
- ReactBits - Copy-paste React components, especially useful for landing page design
- Awesome UI Component Library - Comprehensive curated list across all major frameworks (React, Vue, Angular, etc.)
Workflow for Component Libraries: If you're using shadcn/ui, set up the shadcn MCP server. All shadcn components come with install commands and corresponding code, and the MCP server puts everything in a registry your AI can access directly. This means: (1) no web searches needed (which often miss components or return outdated results), and (2) no manual copy-pasting—the AI handles installation automatically. Just say "Add the button and dialog components" or "Build a contact form using shadcn components" and it's done.
Pro tip: You can configure the shadcn MCP server to access other component libraries like Kibo UI. This video explains how to set up the registry configuration in more detail.
2. 🎨 Illustrations
Custom illustrations add personality to your landing pages, empty states, loading screens, and onboarding flows.
Current State: I haven't found a good MCP server for illustrations yet. The best workflow remains using dedicated tools outside of Claude Code.
Recommended Approach: Midjourney
For illustrations, Midjourney remains the gold standard. Here's why it doesn't make sense as an MCP:
- The best experience is browsing styles, experimenting with prompts, and exploring variations
- You need to see multiple options and pick the one that fits your vision
- Once you have the illustration, simply import it into your project
Pro tip for consistent illustrations:
Use Midjourney's Style Reference feature to maintain consistent visual styles across your application:
- Find a style you like - Browse Midjourney's community and find an artist's style that fits your brand
- Reference that style - Use the
--srefparameter to generate new illustrations in the same style - Build a style library - Keep a collection of style references for different moods (playful, professional, minimal, etc.)
This ensures your empty states, loading screens, and onboarding illustrations all feel cohesive rather than randomly generated.
Example workflow:
- Generate hero illustration for landing page in a specific style
- Save that style reference
- Generate empty state illustrations in the same style
- Generate loading state illustrations in the same style
- Your entire app now has consistent visual language
3. 📸 Images
You need generated images for hero sections, backgrounds, blog post covers, and visual content.
Recommended MCP:
🏆 ImageGen MCP
Uses OpenAI's image generation API through an MCP server. Claude Code can call it directly. Perfect for:
- Hero section backgrounds
- Blog post cover images
- Marketing visuals
- Placeholder images for prototypes
When to use it:
- You need quick image generation without leaving your workflow
- You want to test different visual concepts rapidly
- You're building prototypes and need placeholder images
- You want AI-generated backgrounds for landing pages
4. 🎯 Icons
Icons are everywhere (navigation bars, feature lists, buttons, empty states, etc.). Finding, downloading, and importing SVG icons is time-consuming.
The issue is even with a solid UI library (which should include basic icons), you'll often need specific icons that aren't included. The typical workflow is tedious:
- Go to an icon website
- Search for the right icon
- Download it
- Import the SVG into your project
- Integrate it with your components
This happens constantly during development and breaks your flow.
Recommended MCP:
🏆 Icons8 MCP
Provides instant access to high-quality SVG and PNG icons directly in Claude Code.
Why it's essential:
- Massive library - Access to 40,000+ icons across multiple styles
- No context switching - Search and insert icons without leaving Claude Code
- Multiple styles - iOS, Material, Fluent, Color, and more
- Production-ready - SVG format for scalability, PNG for quick prototyping
Common use cases:
- Adding feature icons to landing page sections
- Building navigation bars with custom icons
- Creating icon-based bullet lists
- Adding visual indicators to buttons and CTAs
- Designing empty states with relevant icons
Pro tip: When designing landing pages, you'll often realize you need 5-10 different icons for your feature grid or benefits section. With Icons8 MCP, you can generate all of them in one session without breaking your flow.
5. 👁️ Visual Feedback & Annotations
When working on UX/UI, the AI needs to see what the interface actually looks like and understand exactly what needs to change.
Recommended MCP:
🏆 Pointa
For visual UI annotations and bulk feedback. I've been working on my own open-source tool for this exact workflow. Check out the GitHub repo and install it from the Chrome Web Store.
This is one of the most useful tools for vibe coding workflows. Claude in Chrome can already inspect and operate your browser, but Pointa adds something different: precise, asynchronous visual feedback. You can annotate many elements in one pass, then let Claude Code process the whole batch. It is completely free and open-source.
How it works:
-
Bulk Annotation Phase - Install the Chrome extension (completely free) and annotate your UI on
localhostdirectly. Click on any element and describe what needs to change. The key advantage: you can annotate 10+ things in a row across your entire website without context switching. Just keep clicking and describing. -
Automatic Implementation - All annotations are saved locally. Go back to Claude Code and simply say: "Read the annotations and fix them." The MCP server fetches your annotations, creates a task list, and fixes issues one by one.
Why this matters:
After shipping a feature, you spin up localhost and inevitably notice 5-6 different things to change (button placement, text copy, spacing issues, etc.). Instead of going back and forth to Claude Code for each fix, you annotate everything while it's fresh and visible, then let Claude handle all fixes in bulk.
The tool knows the exact element you're referencing on the exact page—no manual selector hunting or vague descriptions like "the button in the top right." This is visual interaction with your app combined with batch processing, exactly what modern AI-assisted development needs.
Memories: Building Project Context Over Time
Claude Code has two memory systems: instructions that you curate and auto memory that Claude writes for itself. Auto memory stores useful local notes about build commands, debugging discoveries, architecture, and preferences across sessions.
Best practices:
- Keep team rules in
CLAUDE.mdor.claude/rules/ - Let auto memory capture useful discoveries that do not yet deserve a permanent rule
- Run
/memoryto inspect loaded instructions and stored notes - Remove outdated or incorrect memories before they become future bugs
- Move stable knowledge into version control when the whole team needs it
Auto memory is stored per repository on your machine. It is not shared with teammates. For more details, see the Claude Code memory documentation.
🤝 Part 6: Human in The Loop
AI will likely write large parts of your code, but there are critical moments where it's genuinely more practical for you to step in. Not because the AI can't do it technically, but because certain tasks are either security-sensitive, involve clicking through third-party UIs, or require human judgment that's simply inconvenient to automate.
Here are the three scenarios where human intervention makes the most sense:
🔑 Generating and Adding API Keys
API keys are sensitive credentials. You don't want the AI handling your production secrets, and most key generation requires clicking through dashboards, verifying emails, or completing security challenges that AI can't easily navigate.
Examples:
- Generating production API keys for Stripe, SendGrid, or AWS
- Creating service account credentials
- Setting up OAuth client IDs and secrets
- Configuring webhook signing secrets
- Adding environment variables to production environments
Best practice: Have the AI create placeholder environment variables in your .env.example file and document what keys are needed, but you handle the actual generation and secure storage.
🔧 Setting Up Third-Party Services
Third-party service configuration often requires navigating external dashboards, verifying domain ownership, enabling specific features through checkboxes, or making account-level decisions that require context beyond what the AI has.
Examples:
- Setting up Google OAuth consent screens
- Configuring Stripe webhooks and test mode
- Verifying domain ownership in email services (SPF, DKIM records)
- Setting up Supabase projects and enabling RLS policies
- Configuring analytics platforms (PostHog, Mixpanel)
- Setting up CI/CD pipeline secrets in GitHub Actions
Best practice: Let the AI handle the code integration (API calls, SDK setup, error handling), but you handle the account configuration, security settings, and service activation.
✅ Testing Tasks on Localhost
When you've broken down a complex feature into smaller tasks (as we covered in Part 4), it's usually a good idea to validate each milestone before moving to the next. The AI can run automated tests, but you need to actually use the feature in your browser, click around, and verify it works as you intended.
Examples:
- Spinning up
localhostafter the data model is complete - Testing user flows after backend logic is implemented
- Verifying UI components match your expectations
- Checking edge cases and error states manually
- Validating the feature works across different browsers
- Ensuring the UX feels right (not just functionally correct)
Best practice: After each major task completion, take 5-10 minutes to manually test in localhost. This catches issues early before they compound into bigger problems.
How Claude Code Keeps You in the Loop by Design
Three built-in mechanisms do most of this work before you write a single prompt:
- Permission prompts for external actions. Keep
git push, deploy commands, and anything that talks to a third-party service out of your allow list. Claude Code stops and asks, which is exactly the checkpoint you want. Use theasklist insettings.jsonfor commands that are too useful to deny but too risky to auto-approve. - Structured questions. When a decision is yours to make (which auth provider, which pricing tier), Claude Code can pause and ask you a multiple-choice question instead of guessing. The templates'
CLAUDE.mdtells it to ask before any change that affects scope, data, security, or billing. - Notifications. A
Notificationhook (Part 13) pings you when Claude needs input, so a session that is waiting for a human does not sit idle for an hour.
Making Human Intervention Systematic
Here's the key insight: the AI should proactively tell you when human intervention is needed, not leave you guessing.
The Notification Approach
At the end of each task, prompt the AI to flag any required human intervention. Add this to your implementation prompts or CLAUDE.md:
After completing each task:
- Verify all tests pass
- List any human intervention required with step-by-step instructions
- Mark the task as "Ready for Human Review" if manual testing is needed
This way, the AI explicitly tells you: "I've completed the code, but you need to manually test the login flow" or "I've integrated Stripe, but you need to add your API keys and configure webhooks."
The Tracking System: human-actions.json
For larger projects or when working in teams, I recommend creating a structured tracking file that the AI maintains throughout development. This file lives at your project root and gets updated as the AI encounters tasks requiring human intervention.
📋 Click to see example human-actions.json
{
  "actions_required": [
    {
      "id": "HA-001",
      "title": "Add Stripe API Keys",
      "status": "pending",
      "priority": "high",
      "category": "api_keys",
      "task_reference": "Task 3: Implement Payment Processing",
      "description": "Stripe integration is complete, but production API keys need to be added",
      "instructions": [
        "1. Go to https://dashboard.stripe.com/apikeys",
        "2. Generate a new Restricted Key with these permissions: Customers (Write), Payment Intents (Write), Webhook Endpoints (Write)",
        "3. Copy the key and add it to `.env` as STRIPE_SECRET_KEY",
        "4. Add the same key to your production environment (Vercel/Railway)",
        "5. In Stripe dashboard, go to Developers > Webhooks",
        "6. Add endpoint: https://yourdomain.com/api/webhooks/stripe",
        "7. Select events: payment_intent.succeeded, payment_intent.payment_failed",
        "8. Copy the webhook signing secret and add as STRIPE_WEBHOOK_SECRET"
      ],
      "blocked_tasks": ["Task 4: Email Receipt Generation"],
      "created_at": "2025-10-06T10:30:00Z"
    },
    {
      "id": "HA-002",
      "title": "Configure Google OAuth",
      "status": "pending",
      "priority": "high",
      "category": "third_party_setup",
      "task_reference": "Task 5: Social Authentication",
      "description": "Google OAuth integration code is ready, but OAuth consent screen needs configuration",
      "instructions": [
        "1. Go to https://console.cloud.google.com/apis/credentials",
        "2. Create a new OAuth 2.0 Client ID (or edit existing)",
        "3. Add authorized redirect URIs:",
        "   - http://localhost:3000/api/auth/callback/google (development)",
        "   - https://yourdomain.com/api/auth/callback/google (production)",
        "4. Copy Client ID and Client Secret",
        "5. Add to `.env`: GOOGLE_CLIENT_ID and GOOGLE_CLIENT_SECRET",
        "6. Go to OAuth consent screen tab",
        "7. Add your app name, support email, and logo",
        "8. Add scopes: email, profile",
        "9. Add test users for development phase",
        "10. Submit for verification once ready for production"
      ],
      "blocked_tasks": ["Task 6: User Profile Integration"],
      "created_at": "2025-10-06T12:00:00Z"
    }
  ]
}
How to use it:
- During task breakdown, ask the AI to identify any human intervention needed for each task
- During implementation, the AI updates
human-actions.jsonwhenever it completes work requiring your action - Before starting each coding session, review actions with
"status": "pending"and knock out what you can - After completing actions, change the status from
"pending"to"done"
The goal isn't to have the AI do everything, it's to have the AI do what it's good at (writing code, following patterns, handling repetition) while you do what you're good at (security decisions, UX judgment, service configuration, exploratory testing).
Think of it like a pilot and autopilot: the autopilot handles the tedious parts of flying, but the pilot still makes critical decisions, monitors systems, and takes over when needed.
🧪 Part 7: Testing Gatekeepers
Writing tests is critical as mentioned in our other article here.
Testing gatekeepers are automated safety nets that prevent broken code from reaching production. There are three different types you can use:
- watch mode during development
- pre-commit testing before version control
- CI/CD pipeline before production
🔄 Watch Mode: Real-Time Feedback
Watch mode runs your tests automatically as you develop, giving you instant feedback when something breaks. This is your first line of defense against regressions. The beauty of it is that it allows the LLMs to get real-time feedback on whether it is messing up anything in your code. This means it will have less investigation work to do to fix it later on. It knows exactly what caused the issue aka the last edit it made.
Setting Up Watch Mode in Claude Code
Add to your implementation prompts:
Before starting implementation:
1. Start the test runner in watch mode
2. Keep all existing tests passing
3. Ensure tests pass before marking the task complete
How Claude Code runs it: ask Claude to start the watcher as a background task. The process keeps running while Claude edits, Claude reads the new output when it checks the tests, and you can inspect every background process with /tasks. If the watcher is already running in another terminal, Claude cannot see it, so let Claude own the process.
The Claude Code gate: no commit when tests fail
Pre-commit frameworks (below) work with every tool. Claude Code adds a cheaper gate that fires before the command even runs: a PreToolUse hook on Bash. The hook receives the command as JSON on stdin. Exit code 2 blocks the call and sends the message on stderr back to Claude as the reason.
{
  "hooks": {
    "PreToolUse": [
      {
        "matcher": "Bash",
        "hooks": [
          { "type": "command", "command": ".claude/hooks/test-gate.sh", "timeout": 300 }
        ]
      }
    ]
  }
}
#!/bin/bash
# .claude/hooks/test-gate.sh
input=$(cat)
cmd=$(printf '%s' "$input" | jq -r '.tool_input.command // empty')
case "$cmd" in
*"git commit"*)
pnpm test --run >/tmp/test-gate.log 2>&1 || {
echo "Test gate: tests failed, commit blocked. See /tmp/test-gate.log" >&2
exit 2
} ;;
esac
exit 0Claude sees the failure message as feedback, fixes the tests, and commits again. The templates include this script in setup/.claude/hooks/.
Framework-specific commands:
npm run test:watch
# or
pnpm test:watch
🛡️ Pre-Commit Testing: Your Last Line of Defense
Pre-commit hooks ensure that no broken code enters your git history. This is especially critical when working with AI-generated code that might have subtle bugs.
Using Husky
# Install Husky
pnpm add -D husky

# Initialize Husky
npx husky init

# Add pre-commit hook
echo "pnpm test" > .husky/pre-commit
chmod +x .husky/pre-commit
For faster commits, use lint-staged to test only changed files:
# Install lint-staged
pnpm add -D lint-staged

# Add to package.json
{
  "lint-staged": {
    "*.{ts,tsx,js,jsx}": ["pnpm test --findRelatedTests"]
  }
}

# Update pre-commit hook
echo "pnpm lint-staged" > .husky/pre-commit
🚀 CI/CD Pipeline: The Final Gate
While watch mode and pre-commit hooks catch issues during development, CI/CD runs your full test suite before code reaches production - including slow tests like E2E and visual regression tests.
Setting Up GitHub Actions
Create .github/workflows/test.yml:
📄 Example workflow (Next.js/TypeScript)
name: Tests

on:
  push:
    branches: [main]
  pull_request:
    branches: [main]

jobs:
  test:
    runs-on: ubuntu-latest

    steps:
      - uses: actions/checkout@v4

      - uses: pnpm/action-setup@v3
        with:
          version: 8

      - uses: actions/setup-node@v4
        with:
          node-version: 20
          cache: 'pnpm'

      - name: Install dependencies
        run: pnpm install

      - name: Type check
        run: pnpm type-check

      - name: Lint
        run: pnpm lint

      - name: Run tests
        run: pnpm test

      - name: Build
        run: pnpm build
Enforce Tests Before Merge
Enable branch protection in GitHub (Settings → Branches → Branch protection rules):
- ✅ Require pull request before merging
- ✅ Require status checks to pass before merging
- ✅ Select your test workflow
Now no code (including AI-generated) can merge if tests fail. You are safe.
The Three-Tier System
This is the best testing safeguard I have found so far. If it seems like too much, you can probably skip watch mode as the other steps will catch the regressions anyway. Pre-Commit and CI/CD testing are non-negotiable though.
┌─────────────────────────────────────┐
│  🔄 Watch Mode (< 5s)                │  ← Instant feedback
│  • Real-time test feedback          │
│  • Auto-runs on file changes        │
└─────────────────┬───────────────────┘
                  │
┌─────────────────▼───────────────────┐
│  🛡️ Pre-Commit (< 30s)               │  ← Before git history
│  • Type checking                    │
│  • Fast unit and integration tests  │
│  • Blocks commit if fails           │
└─────────────────┬───────────────────┘
                  │
┌─────────────────▼───────────────────┐
│  🚀 CI/CD (< 15min)                  │  ← Before production
│  • Full test suite                  │
│  • Integration tests                │
│  • E2E tests                        │
│  • Build verification               │
│  • Blocks merge if fails            │
└─────────────────────────────────────┘
Tests get slower and more comprehensive at each stage. Pre-commit runs fast critical tests (< 30s), CI/CD runs everything.
🐛 Part 8: Debugging
Debugging with AI is fundamentally different from traditional debugging. The LLM can't see your screen, doesn't have psychic powers, and won't magically know what's wrong. But when given proper context, it becomes incredibly effective at diagnosing and fixing issues.
The key to successful debugging with AI is this: Treat the LLM like a senior developer you're asking for help. Would you send a Slack message saying "it's broken, fix it"? No. You'd provide context, logs, steps to reproduce, and what you expected vs. what actually happened. Do the same with your AI. Be kind and considerate.
Accessing Console Logs
As we discussed in Part 5: Context Window, effective debugging requires access to console logs. In the Logs section of Part 5, we recommended:
- Claude in Chrome - The simplest option: start with
claude --chromeand Claude reads the console of your real, logged-in browser - Chrome DevTools MCP - For browser console logs, network requests, and performance analysis (maintained by Google)
- Playwright MCP - For browser automation and end-to-end testing (maintained by Microsoft)
These tools give your AI direct access to console output, network traffic, and browser state, making debugging significantly more effective.
Accessing Server Logs
While MCPs handle frontend logging beautifully, server-side debugging requires you to know where your logs live.
Here's the challenge: Claude Code can read output from processes it starts, but it cannot automatically attach to every process already running in another terminal.
Claude Code can:
- ✅ Start a development server or test watcher as a background task
- ✅ Read new output from that task and manage it through
/tasks - ✅ Run commands that query logs, ports, and process state
- ✅ Read log files from your filesystem
- ❌ Recover output that only appeared in an unrelated terminal and was never saved
The easiest workflow is to let Claude start the development server inside the session. File-based logging remains valuable because logs survive restarts, can be searched, and work in production. Some frameworks do this by default (Rails, Laravel), while others require configuration (Next.js, Python).
Select your framework below to see the best approach:
Development (Default Behavior)
By default, Next.js outputs logs directly to the terminal where npm run dev is running.
If Claude Code started the Next.js server, it can inspect that task's output. If the server is running in another terminal, you still need to paste the logs or write them to a file.
Solution: Configure File-Based Logging
Use Winston or Pino to write logs to files that Claude Code can read directly.
Install Winston:
npm install winstonConfigure logger (lib/logger.ts):
import winston from 'winston'

const logger = winston.createLogger({
  level: 'info',
  format: winston.format.json(),
  transports: [
    new winston.transports.File({
      filename: 'logs/error.log',
      level: 'error'
    }),
    new winston.transports.File({
      filename: 'logs/combined.log'
    }),
  ],
})

export default logger
Use in your code:
import logger from '@/lib/logger'

logger.info('Payment processing started', { userId: user.id })
logger.error('Payment failed', { error: error.message })
Prompt Claude Code to Read Logs
"Read logs/error.log and show me the most recent errors
related to the payment processing."
✅ Best Practice: Configure file-based logging for serious Next.js projects. It makes debugging with Claude Code easier and gives you history across restarts.
Logging Best Practices
When debugging, good logging makes all the difference. Follow these simple practices and add them to your prompts or .claude/rules/logging.md.
In the templates, I provide a comprehensive logging-standards.md file that you can add to your project and adapt to your stack. The key principles are:
1. Use Structured Logging (JSON Format)
Log data as structured objects, not strings. This makes logs easily searchable and parseable.
// ✅ Good: Structured
logger.info('Payment processed', { userId: 123, amount: 49.99, orderId: 'ORD-456' })

// ❌ Bad: Unstructured
logger.info(`Payment of $49.99 processed for user 123`)
2. Include Context (Who, What, When, Where)
Always log enough information to track down issues:
- User/Request ID - Who triggered this?
- Key data - What values matter? (amounts, IDs, status)
- Location - Which function/endpoint?
3. Log Critical Entry/Exit Points
Log when important operations start and finish, especially for external API calls, database operations, or payment processing.
4. Never Log Sensitive Data
Never log passwords, API keys, credit card numbers, session tokens, or personal information.
Language-Specific Examples:
Using Winston (recommended):
import winston from 'winston'

const logger = winston.createLogger({
  level: 'info',
  format: winston.format.json(),
  transports: [
    new winston.transports.File({ filename: 'logs/app.log' })
  ]
})

// Log with context
logger.info('Payment started', {
  userId: user.id,
  amount: payment.amount,
  orderId: order.id
})

// Log errors with stack traces
try {
  await processPayment(payment)
  logger.info('Payment successful', { orderId: order.id })
} catch (error) {
  logger.error('Payment failed', {
    orderId: order.id,
    error: error.message,
    stack: error.stack
  })
}
The Bug Reporting Format That Actually Works
The single most important factor in good debugging is the quality of your bug report. A good bug report provides everything the LLM needs to diagnose and fix the issue. A bad one forces the LLM to make assumptions, which almost always leads to wasted time and regressions.
I have worked with enough developers in the past, providing terribly lazy bug reports (sorry), to know that saying “it doesn’t work” without context is considered a war crime in software engineering.
Every bug report must include:
- Trigger & Location - What action causes it? Where does it happen?
- Expected vs Actual Behavior - What should happen vs what actually happens?
- Steps to Reproduce - Clear, numbered steps anyone can follow
- Environment Details - OS, browser, device, app version
- Logs & Evidence - Console logs, server logs, network logs, stack traces
❌ Bad: "The payment button is broken"
✅ Good: "Clicking 'Submit Payment' on /checkout returns 500 error with 'Invalid API key' in server logs. Expected: redirect to confirmation. Actual: error message. Steps: 1) Login, 2) Add item, 3) Checkout, 4) Click submit"
Using the Debugging Agent
For complex bugs, use a structured debugging agent. The templates include it twice: as a reference prompt at specifications/special_prompts/debugging_agent_prompt.md, and as a ready-to-run Claude Code skill at setup/.claude/skills/debug/SKILL.md.
This prompt includes:
- Complete bug report template with all the best practices above
- Structured 3-phase debugging workflow (Collection → Analysis → Fix)
- Language-specific guidance for accessing logs
- Examples of good vs bad bug reports
- MCP integration instructions for Chrome DevTools and Playwright
Invoke the skill with the symptom as the argument:
/debug clicking Submit Payment on /checkout returns a 500 with "Invalid API key"The skill receives the text through $ARGUMENTS, loads the full debugging prompt into the session, and starts the collection phase.
The agent will guide you through a 3-phase process: gather all required information, analyze root cause, then implement and verify the fix.
"Rubber Ducking" with AI
In programming, there's a debugging technique called rubber ducking - where you explain your problem out loud to an inanimate object (traditionally a rubber duck). The act of explaining forces you to think through the problem systematically, and often you'll realize the solution mid-explanation without the duck saying a word.
AI is the perfect rubber duck. Unlike the inanimate version, it can actually respond, ask clarifying questions, and help you explore your thinking.
As you explain, you'll often catch your own mistakes. The AI might ask questions like:
- "Have you checked if X is null?"
- "What happens if Y occurs before Z?"
- "Could this be a race condition?"
These questions trigger realizations you wouldn't have had by staring at code alone.
When the AI struggles to fix an issue:
If Claude Code tries multiple times but can't fix a bug, force it to rubber duck with itself:
Stop trying to fix this immediately. Use the Rubber Duck approach. Instead:

1. Walk me through what you understand about the problem
2. List your assumptions about how this code works
3. Identify what you're uncertain about
4. Ask me clarifying questions before proposing a solution

Let's think through this together rather than trying random fixes.
This approach works surprisingly well. By forcing the AI to articulate its understanding first, it often identifies gaps in its mental model or realizes assumptions it was making. The process of explaining reveals the solution, just like it does for humans.
Both humans and AI models benefit from externalizing thought processes. When you force yourself (or the AI) to explain reasoning step-by-step, you expose faulty assumptions, logical gaps, and overlooked details that were invisible when just "thinking about it."
Here's what I find funny about this technique - you actually become the AI's rubber duck. Think about that for a second. The traditional rubber ducking pattern is: human explains problem → inanimate duck "listens" → human finds solution. But when you prompt the AI to walk through its reasoning, you're sitting there silently reading as the AI explains its problem to you. You don't even need to respond. The AI just types out its understanding, realizes its mistake mid-explanation, and goes "oh wait, I see the issue now."
I've experienced this firsthand on several debugging sessions. The AI gets stuck, I ask it to explain what it thinks is happening, and halfway through its explanation it essentially goes "never mind, I figured it out." You're literally serving as a rubber duck for an AI model. The future is weird.
👀 Part 9: Code Reviews
Code reviews are a fundamental part of any engineering workflow. When you're vibe coding at 10x the speed with AI agents generating hundreds of lines per session, having an automated reviewer becomes even more critical. You need a second set of eyes catching bugs, security issues, and code quality problems before they make it to production.
The AI code review space is exploding. If you use Claude Code, four levels make sense: the built-in local review, ultrareview for a deeper cloud pass, Claude Code Review for managed GitHub reviews, and CodeRabbit as a platform-agnostic alternative.
The Local Review
Before investing in a paid review tool, use Claude Code's built-in /code-review command. It runs a review as a background subagent with its own context window and counts against your normal Claude Code usage. /review remains an alias.
/code-reviewYou can also provide a GitHub pull request number. Use /security-review when you want a focused review of security risks in the pending branch changes.
/code-review 428
/security-review
For difficult changes, set the effort level first:
/effort high
/code-review
By default, the local review reports findings without changing your files. Use /code-review --fix only when you want it to apply the findings to your working tree, or /code-review --comment when you want inline pull request comments. Verify every important finding before you accept a fix.
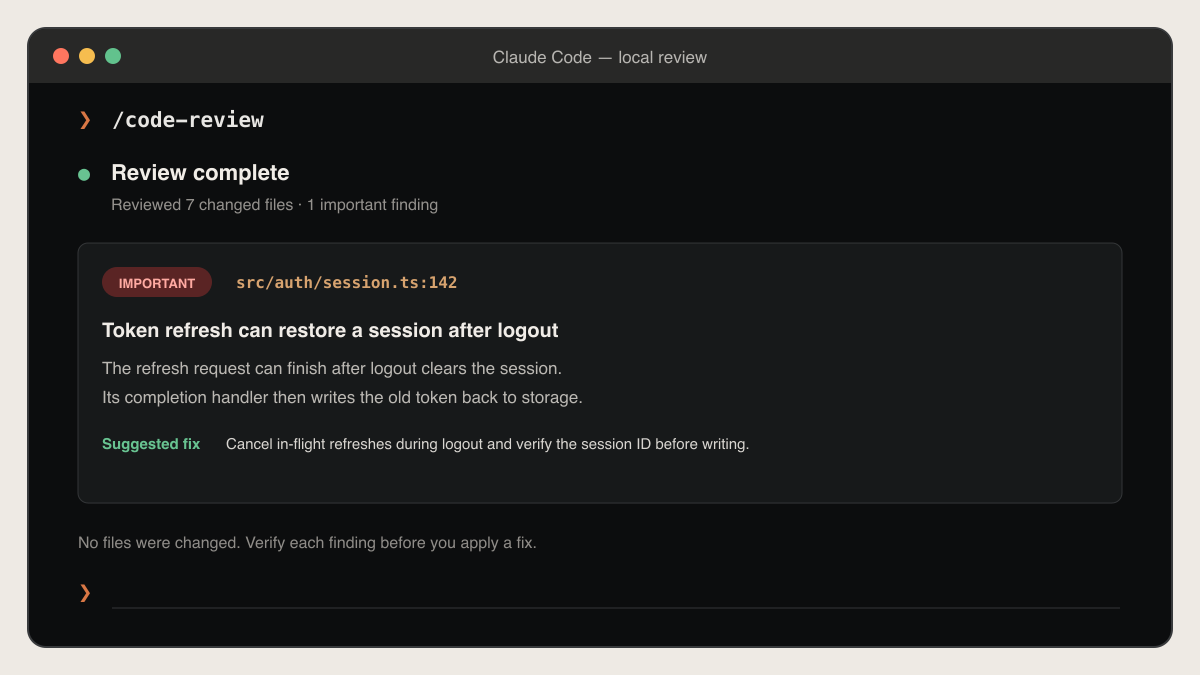 Run /code-review before you push
How to use it:
- Finish a logical unit of work
- Run your tests and linters
- Run
/effort high, then/code-review - Verify every important finding against the code
- Fix real problems and reject false positives
- Commit and push when the branch is clean
This is perfect for solo developers and small teams. It requires no GitHub app and works before the code leaves your machine.
For a substantial pre-merge change, /code-review ultra is the deeper option. /ultrareview remains an alias. It uploads the branch or pull request to a remote sandbox and uses several reviewer agents with independent verification. It runs in the background and usually takes 5-10 minutes. It is billed through usage credits rather than your normal session allowance. Claude Code shows the scope and the estimated cost before it starts, so read that screen rather than this guide for the current price.
/code-review ultra
/code-review ultra 428
Use it deliberately. It is a research preview and requires Claude.ai authentication, so availability depends on your plan and provider. Check the current docs before you build a team workflow around it.
Claude Code Review
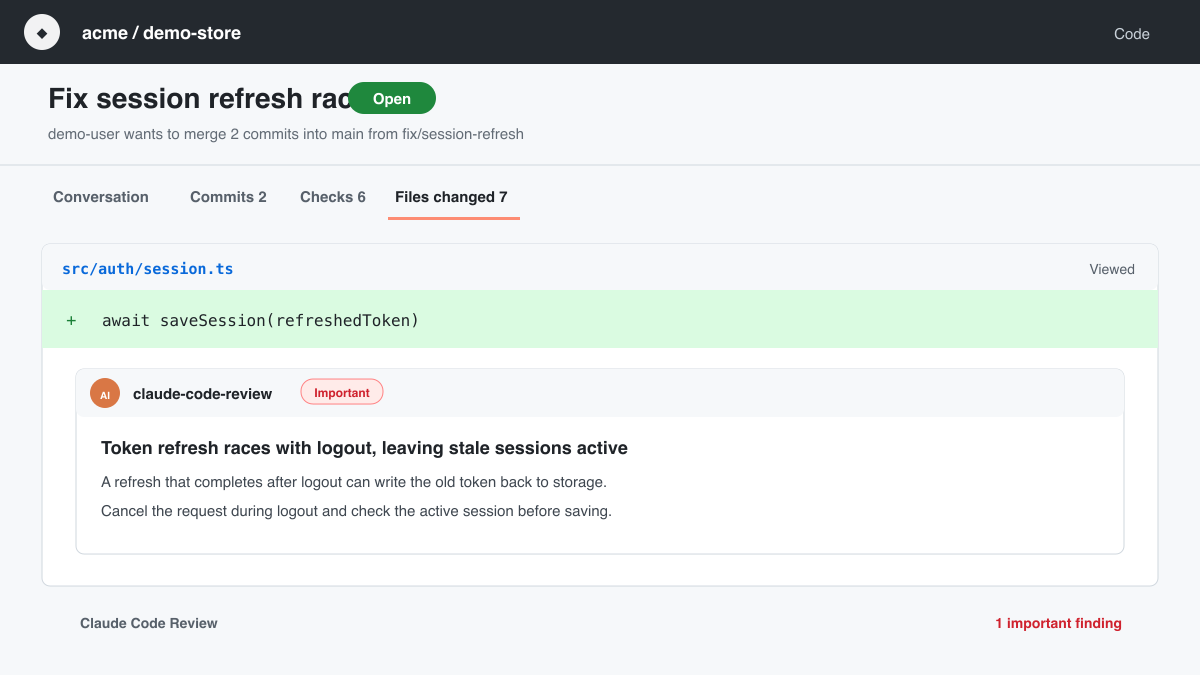
What It Does: Claude Code Review analyzes GitHub pull requests with several specialized agents. They inspect the diff in the context of the codebase, verify possible findings, remove duplicates, rank severity, and post inline comments.
Key Features:
- Multi-agent analysis: Different agents look for logic errors, security problems, regressions, and edge cases
- Verification step: Candidate findings are checked against the code to reduce false positives
- Custom review rules: Use
CLAUDE.mdfor project context andREVIEW.mdfor review-only instructions - Manual or automatic triggers: Review once, after every push, or when someone comments
@claude review - Severity levels: Important, Nit, and Pre-existing findings are separated
- GitHub annotations: Findings appear in inline comments, the Files Changed view, and the check summary
Pricing: Claude Code Review is billed separately through usage credits. The cost scales with the size of the pull request and the complexity of the repository, so check the current pricing page before you turn on automatic reviews.
Best For:
- Teams already using Claude Code
- GitHub repositories that need deep PR review
- High-value changes where a multi-agent review is worth the cost
- Teams that want review rules in
REVIEW.md
Limitations:
- Research preview
- Availability depends on your plan, so check the current docs
- GitHub only
- Not available for organizations with Zero Data Retention enabled
- Expensive if you run a full review after every small push
Pro tip: Start in manual mode. Comment @claude review only when a PR is ready. If you enable review after every push, a five-push PR pays for five reviews instead of one.
CodeRabbit
What It Does: CodeRabbit provides codebase-aware reviews with automatic linter integration, security analysis, and code graph analysis. It combines many static analyzers and linters with AI reasoning.
Key Features:
- MCP Integration: Connects to tools such as Jira, Linear, documentation, and Figma for richer context
- Code Graph Analysis: Uses syntax-aware analysis to understand dependencies across the codebase, not just the PR diff
- 40+ Linters: Runs popular static analyzers, linters, and security tools
- Agentic Chat: Generates code, tests, and issues through multi-step workflows
- Auto-Learning: Adjusts over time based on feedback and coding patterns
- Multi-Platform: Works with GitHub, GitLab, and Bitbucket
Pricing: The Pro plan is $24/developer/month when billed annually or $30 month-to-month. A limited free plan is available, and qualifying public open-source repositories get free reviews.
Best For:
- You need GitLab or Bitbucket support
- You want predictable per-seat pricing
- You want broad static analysis and linter coverage
- You work on open-source projects
Limitations:
- Less integrated with Claude Code
- Can produce false positives that require manual review
- Adds another external service with access to your repository
Which One Should You Choose?
Start with /code-review if you work alone or are building the habit. It gives you immediate value before you push anything.
Use /code-review ultra before merging a substantial change when a verified multi-agent pass is worth the usage-credit cost.
Add CodeRabbit when you want continuous, platform-independent PR review with predictable pricing and broad linter coverage.
Use Claude Code Review for important GitHub pull requests where deeper multi-agent verification justifies the higher per-review cost. You do not need to run it on every typo fix.
📦 Part 10: Version Control
Version control is one of the most powerful tools for managing AI-assisted development. When Claude Code makes extensive changes across multiple files in minutes, Git transforms potentially chaotic work into structured, reviewable, and reversible commits.
This section covers both fundamental version control principles and practical automation strategies for vibe coding workflows.
Key Version Control Principles
When to Commit
Create commits for logical checkpoints that represent semantic boundaries, not arbitrary saves. The core principle: commit based on features, not time.
For vibe coding specifically:
✅ Commit incrementally as you complete logical units of work. Since Claude Code can make extensive modifications, you need structured tracking more than ever.
✅ Commit when something works and doesn't break existing functionality. Each commit should represent a stable state you could potentially deploy.
✅ Keep commits small and granular. Fixing two different bugs should produce two separate commits. Tiny, atomic commits make code reviews easier and help isolate issues when debugging.
✅ Each commit should be focused. One commit = one concept. If you're adding a feature AND refactoring AND fixing a bug, that's three commits.
Bad commit patterns:
# Too vague
git commit -m "updates"
git commit -m "fixed stuff"

# Too broad
git commit -m "added login, fixed navbar, updated styles"

# Time-based rather than logic-based
git commit -m "end of day changes"
Good commit patterns:
# Clear, focused commits
git commit -m "feat: add OAuth login with Google"
git commit -m "fix: resolve navbar z-index issue on mobile"
git commit -m "refactor: extract user validation logic to utils"
Commit Message Best Practices
Use Conventional Commits format with structured types to make commit messages actually useful and enable automated tooling.
Standard commit types:
feat:- New featuresfix:- Bug fixesdocs:- Documentation changesrefactor:- Code restructuring without behavior changestest:- Adding or updating testschore:- Maintenance tasks (dependencies, configs)perf:- Performance improvementsci:- CI/CD pipeline changesbuild:- Build system or dependency changesrevert:- Reverting previous commits
Examples:
# Simple commit
feat: add user authentication

# With scope
feat(auth): add OAuth login with Google

# With body for context
fix(api): resolve rate limiting bug

Rate limiter was incorrectly counting requests per user
instead of per IP address. Updated logic to use IP-based
tracking and added tests.

# Breaking change
feat(api)!: change user ID format to UUIDs

BREAKING CHANGE: User IDs changed from integers to UUIDs.
All API endpoints now expect UUID format for user identifiers.
Writing guidelines:
✅ Use imperative mood - "Fix bug" not "Fixed bug" or "Fixes bug"
✅ Keep first line under 50 characters - Forces you to be concise
✅ Keep the subject lowercase after the type - feat: add OAuth login, as in every example above
✅ No period at the end - It's a title, not a sentence
✅ Add body for complex changes - Explain the "why" not the "what"
✅ Reference issues/tickets - Link to context: Closes #123 or Fixes #456
Branching Strategy
For solo projects or small teams doing vibe coding, keep your branching simple. You don't need GitFlow or complex strategies - those are for large teams with strict release schedules.
Recommended approach:
mainbranch - Always deployable, production-ready code- Feature branches - One per feature or fix
- Delete after merge - Keep your repo clean
Branch naming conventions:
# Features
feature/user-authentication
feature/payment-integration

# Bug fixes
fix/navbar-mobile-bug
fix/api-timeout-issue

# Experiments
experiment/new-ui-design
experiment/performance-optimization

# Refactors
refactor/database-queries
refactor/component-structure
Workflow:
# Start new feature
git checkout main
git pull origin main
git checkout -b feature/user-auth

# Work on feature, commit incrementally
git add .
git commit -m "feat(auth): add login form component"
git commit -m "feat(auth): integrate OAuth provider"

# Push and create PR
git push -u origin feature/user-auth

# After PR merged and deployed
git checkout main
git pull origin main
git branch -d feature/user-auth
For vibe coding specifically:
✅ Auto-create feature branches when starting new work with AI. Configure your workflow to automatically create a branch named after the feature.
✅ Create backup branches before making experimental changes with AI agents. Name them backup/feature-name so you can easily roll back.
✅ Never force push to main/master - This is a hard rule. Fix problems with new commits, not by rewriting history.
Automated Commit Workflows
Now that you understand version control principles, let's talk about automating commits in your Claude Code workflow.
Why automation matters
Version control is critical, but it's also boring and easy to forget. When you're watching Claude change code across many files, stopping to craft a perfect commit message feels like friction.
The result? Most developers end up doing one of two things:
- Forgetting entirely - Hours of work with zero commits and no simple rollback point
- Lazy mega-commits -
git commit -m "fixed stuff"covering 47 files and three different features
Neither is good. Make Git easier to use, but keep a human decision before changes leave your machine.
Approach 1: Fully Automatic with Claude Code Hooks
Best for: Isolated, autonomous sessions where frequent machine-made commits are acceptable
Claude Code hooks can run commands at specific lifecycle events. A Stop hook fires when Claude finishes a turn.
{
  "hooks": {
    "Stop": [
      {
        "hooks": [
          {
            "type": "command",
            "command": "git diff --quiet && git diff --cached --quiet || (git add -A && git commit -m 'chore: checkpoint Claude Code changes')"
          }
        ]
      }
    ]
  }
}
How it works:
- Claude finishes a response
- The hook checks for changes
- If changes exist, it stages everything and creates a checkpoint commit
This works, but I do not recommend it as the default. Stop fires after every turn, not after every logical feature. You can easily get 15 tiny commits for one piece of work.
A safer use of hooks is to run deterministic quality checks after edits and let a skill handle the final commit:
{
  "hooks": {
    "PostToolUse": [
      {
        "matcher": "Write|Edit",
        "hooks": [
          {
            "type": "command",
            "command": "pnpm lint",
            "async": true
          }
        ]
      }
    ]
  }
}
Pros:
- ✅ No forgotten changes
- ✅ Automatic checkpoints during long autonomous work
- ✅ Hooks work in the CLI, IDE, desktop app, and web sessions
Cons:
- ❌ Poor commit granularity if attached to every Stop event
- ❌ Stages files you might not want in the same commit
- ❌ Hooks run shell commands with your user permissions
Approach 2: GitHub CLI or MCP for Repository Operations
Best for: Creating pull requests, reading review comments, and managing GitHub without leaving the session
Claude Code can use the authenticated gh CLI directly. This is usually more context-efficient than an MCP server:
Review the current branch, create a clear conventional commit,
push it, and open a draft pull request with gh.
Show me the proposed commit and PR text before you execute anything.
Use the GitHub MCP or official GitHub plugin when you need structured access that goes beyond normal CLI operations.
Pros:
- ✅ Uses the actual Git diff
- ✅ Works for issues, PRs, reviews, and repository search
- ✅ The
ghCLI adds no MCP tool schema to the context
Cons:
- ❌ Authentication and repository permissions require setup
- ❌ Pushes and PR creation are external actions, so they need deliberate approval
- ❌ An MCP adds more configuration than the CLI
Approach 3: Claude Code Skills (Recommended for Human-in-the-Loop)
Best for: Reusable commit shortcuts with full control
Claude Code skills live in .claude/skills/<name>/SKILL.md. They can be invoked with /name. Set disable-model-invocation: true for commit and push workflows so Claude cannot trigger them automatically.
Create .claude/skills/commit/SKILL.md:
name: commit description: Review and commit the current changes disable-model-invocation: true allowed-tools: Bash(git status:) Bash(git diff:) Bash(git add:) Bash(git commit:)
Smart Commit
Generate a conventional commit message and commit the current changes.
Requirements
- Read
git status, the staged diff, and the unstaged diff - Separate unrelated changes instead of combining them
- Use Conventional Commits format
- Keep the subject concise and use imperative mood
- Never add secrets, environment files, or unrelated user changes
Process
- Summarize the changed files
- Identify unrelated change groups
- Run the relevant tests or explain why they were not run
- Propose the exact files and commit message
- Wait for my approval
- Stage only the approved files
- Create the commit
- Show the final commit hash and remaining changes
Additional useful skills:
/c- Quick conventional commit for one already-reviewed change/review-and-commit- Review the diff, run tests, then propose a commit/new-branch- Create a feature or fix branch using your naming rules/pr- Push the branch and prepare a pull request after approval
How to use:
/commitClaude analyzes the repository, proposes the exact commit, waits for approval, then executes it.
Pros:
- ✅ Version-controlled with the project
- ✅ Simple Markdown setup
- ✅ Only its one-line description stays in context until you invoke it
- ✅ Full control over when Git changes happen
- ✅ Can restrict allowed tools in skill frontmatter
Cons:
- ❌ Still requires typing
/commit - ❌ You must review the proposed file list and message
Recommended Setup: The Ideal Workflow
Here is the workflow I recommend:
- Branch creation - Manual skill trigger, automatic execution after approval
- Commit - AI-generated message with human review
- Push - Manual decision after you review the local history
1. Add Git conventions to CLAUDE.md or .claude/rules/git.md:
Git Workflow Rules
Commit Message Format
Use Conventional Commits:
- feat: New features
- fix: Bug fixes
- docs: Documentation changes
- refactor: Code restructuring
- test: Adding or updating tests
- chore: Maintenance work
Format: <type>(<scope>): <subject>
- Use imperative mood
- Keep the subject under 50 characters
- Add a body when the reason is not obvious
- Never commit secrets or
.envfiles - Do not stage unrelated user changes
Branch Naming
Use feature/, fix/, experiment/, or refactor/ prefixes.
Use kebab-case: feature/user-authentication.
2. Create Claude Code skills in .claude/skills/:
/new-branch- Propose and create a branch/commit- Review and commit with approval/c- Quick commit for a small, reviewed change/review-and-commit- Run a full local review first
3. Push manually when ready:
git push -u origin feature/your-feature-nameWhy this workflow is better:
✅ Branches follow Git best practices - One branch per feature or fix
✅ Commit quality stays high - Claude drafts the message and you review it
✅ Unrelated changes stay safe - The skill must list files before staging
✅ You control pushes - Nothing leaves the machine until you decide
✅ Context stays clean - Skills load on demand instead of filling CLAUDE.md
Typical workflow:
You: /new-branch new feature: OAuth login with Google
Claude: Create branch feature/oauth-google-login?
You: yes
Claude: Creates the branch

You work on the feature across one or more named sessions.

You: /review-and-commit
Claude: Reviews the diff, runs checks, and proposes the commit.
You: approve
Claude: Creates the commit.

You review git log, then push when ready.
Parallel Work with Worktrees
When two features are in flight, do not run two Claude Code sessions in the same checkout. They will edit the same files and confuse each other's tests. Claude Code supports git worktrees natively: start the session with claude --worktree, or ask Claude to create one for the task, and it gets its own directory and branch while sharing the repository history. The Claude desktop app does this automatically for each session. Finish the feature, open the PR, remove the worktree.
🚀 Part 11: Deployment
AI can help you build features quickly, but deployment is where rubber meets the road. This section covers getting your AI-generated code into production safely and maintaining it there.
The golden rule: Keep it simple. As a solo developer using vibe coding, you don't need enterprise-level complexity. You need a deployment setup that's reliable, automated, and doesn't slow you down.
The Three-Environment Strategy
You need different environments to test different things. Too few environments means bugs reach production. Too many means complexity overhead that kills your velocity.
For solo developers or small dev teams, three environments hit the sweet spot:
- Local (
localhost:3000) - Where you build and iterate fast - Staging (e.g.,
staging.yourapp.com) - Where you validate in production-like conditions - Production (e.g.,
yourapp.com) - Where real users interact with your app
Each serves a distinct purpose. Here's how they work:
1. 🏠 Local - Your development playground
Purpose: Test features as you build them, iterate quickly, break things without consequences.
What you test here:
- Does the feature work?
- Does the UI look right?
- Do tests pass?
- Are there any obvious bugs?
Key characteristic: Fast feedback loop. You're working on localhost:3000 (or whatever port your framework uses), hot reloading on every change, and validating that your AI-generated code actually works. This is where you use identify small bugs or UI issues early. You annotate everything that looks off while it's fresh, then batch-fix it.
2. 🎭 Staging - Production's dress rehearsal
Purpose: Test your code in a production-like environment before real users see it. This is where you catch issues that only appear when your app runs on a real server.
What you test here:
- Performance: How fast do pages load? Are there slow API calls?
- Server behavior: Does SSR work correctly? Are server actions behaving as expected?
- Database interactions: Do migrations run smoothly? Is data persisting correctly?
- Third-party integrations: Are webhooks working? Do OAuth flows complete?
- Build process: Does the production build succeed? Are there any build-time errors?
- Environment variables: Are all secrets properly configured?
- Mobile responsiveness: How does it look on real devices hitting a real URL?
Key characteristic: This is your safety net. Every feature should pass through staging before touching production. Share staging URLs with beta testers, clients, or teammates (if you have them) to get feedback before launch.
Why it's not optional: Some bugs literally cannot be caught on localhost. CORS issues, SSL certificate problems, serverless function timeouts, database connection pooling issues, etc. These only surface when running on real infrastructure.
3. 🚀 Production - The real deal
This environment is sacred. Only deploy here after features are validated in staging. If something breaks here, real users are affected.
Best practice: Never test experimental features directly in production. Never commit "let me try this" code straight to main if that triggers production deploys. Use staging first, always.
Choosing Your Hosting Platform
The right platform depends on your stack, but here are four battle-tested options that work great for solo developers or small teams:
Vercel - Best for Next.js, React, and static sites
Why it's great:
- Zero-config deployment for Next.js (they make it)
- Automatic preview deployments for every push
- Global CDN with edge functions
- Free tier is generous for side projects
- Serverless functions out of the box
Best for: Frontend-heavy apps, Next.js applications
Pricing: Free tier covers most solo projects. Pro plan starts at $20/month when you need more.
Setup time: 5 minutes. Connect GitHub, pick your repo, done.
Railway - Best for full-stack apps with databases
Why it's great:
- Deploy anything (Node, Rails, Python, Go, Rust, etc.)
- Built-in PostgreSQL, Redis, MongoDB provisioning
- Environment variables management is excellent
- Automatic deployments from GitHub
- No serverless constraints—run long-running processes
Best for: Full-stack apps, APIs, apps with background jobs, projects needing traditional servers (not serverless)
Pricing: $5/month credit on free tier, then pay-as-you-go ($0.000463/GB-hour for RAM)
Setup time: 10 minutes. Connect GitHub, add services (database, app), configure environment variables.
Fly.io - Best for global deployment and flexibility
Why it's great:
- Deploy globally with low latency anywhere in the world
- Full Docker support—deploy anything that runs in a container
- Built-in PostgreSQL, Redis
- WebSocket and long-running connection support
- Extremely flexible infrastructure
Best for: Apps needing global distribution, WebSocket-heavy applications, complex deployment requirements
Pricing: New accounts get a short free trial, currently limited to 7 days or 2 total VM hours. After that, Fly.io is pay-as-you-go. A small 256MB shared CPU machine is about $2/month before storage and network charges.
Setup time: 15-20 minutes. Requires a bit more config than Vercel/Railway, but super flexible.
Render - Best for developers who want simplicity with power
Why it's great:
- Simple, intuitive UI that's easier to navigate than AWS or GCP
- Built-in PostgreSQL, Redis databases
- Automatic deploys from GitHub with preview environments
- Static sites, web services, cron jobs all in one platform
- Free SSL certificates and automatic HTTPS
Best for: Full-stack apps, Python/Django apps, Ruby on Rails, static sites, projects needing straightforward deployment without Docker complexity
Pricing: Free tier for static sites and web services (750 hours/month). Paid plans start at $7/month for always-on services.
Setup time: 10 minutes. Connect GitHub, choose service type, done.
Platform Recommendation Decision Tree
Do you use Next.js?
├─ Yes → Vercel (easiest, built by Next.js creators)
└─ No → What's your priority?
    ├─ Simplicity + managed services → Railway or Render
    │   (Great for: quick full-stack apps, less DevOps)
    ├─ Flexibility + global edge → Fly.io
    │   (Great for: Docker, multi-region, WebSockets)
All four are solid choices. Pick the one that feels right for your stack and move on. You can always migrate later if needed (but you can go a very long way with either).
Setting Up Automated Deployments with GitHub Actions
Manual deployments are error-prone and slow. Automated CI/CD means every push gets tested, built, and deployed without you lifting a finger.
The Standard Workflow
Most platforms (Vercel, Railway, Render, Fly.io) have built-in GitHub integration that deploys automatically on push. This is the easiest path:
- Connect your GitHub repo to your hosting platform
- Configure branch-based deployments:
mainbranch → Productionstagingbranch → Staging environment- Any other branch → Preview deployment (optional)
That's it. No GitHub Actions needed for basic deployments, the platforms handle it.
When to Use GitHub Actions
Use GitHub Actions when you need custom pre-deployment steps that platforms don't provide:
Common use cases:
- Running tests before deployment
- Running linters and type checking
- Building Docker images
- Running database migrations
- Notifying team channels (Discord, Slack)
- Custom security scans
- Generating build artifacts
For setting up automated tests in your CI/CD pipeline, see Part 7: Testing Gatekeepers, which covers the complete testing workflow including GitHub Actions setup.
Claude Code in CI: two options exist when you want Claude itself inside the pipeline. The official Claude Code GitHub Action responds to @claude mentions on issues and pull requests: it can answer a question, implement a small fix on a branch, or review a diff, with the repository's CLAUDE.md as context. For scripted jobs, claude -p "..." runs one non-interactive prompt and prints the result, which is enough for a nightly "summarize the failing tests" or "draft the release notes" step. Keep deploy commands out of Claude's allow list in both cases. The platform deploys from main; Claude's job is to get the branch ready.
Pro tip: Most solo developers don't need custom GitHub Actions for deployment. Start with platform-native auto-deploy (Vercel, Railway, Render all support this out of the box). The testing workflow from Part 7 will run automatically before any deployment, blocking broken code from reaching production.
Managing Environment Variables
Your app behaves differently in each environment. Database URLs, API keys, feature flags—all need to be environment-specific and kept secure.
Staging vs Production: Using Different Credentials
Use different credentials for staging and production. Always.
Why this matters:
- Security isolation - If staging credentials leak (more common since you test/share more freely), production remains secure
- Data separation - Staging should never touch production databases or real user data
- Rate limits - API usage in staging won't eat into production quotas
- Cost tracking - Separate billing/usage metrics per environment
- Safe testing - Test payment flows, send emails, trigger webhooks without affecting real users
Service-Specific Guidance:
Payment Processors (Stripe):
- Staging: Use test mode keys (
sk_test_...) - Production: Use live mode keys (
sk_live_...) - Test payments in staging without charging real cards
Email Services (SendGrid, Postmark):
- Staging: Separate API key, optionally whitelist recipient addresses
- Production: Different API key, full delivery enabled
OAuth Providers (Google, GitHub):
- Staging: Register separate OAuth app with staging callback URLs
- Production: Different OAuth app with production callback URLs
- Prevents redirect_uri mismatches
Best Practices
✅ DO:
- Use
.env.exampleto document required variables (commit this) - Keep
.env.localin.gitignore(never commit secrets) - Prefix client-side variables with
NEXT_PUBLIC_(Next.js) or similar - Store secrets in your hosting platform's dashboard
- Use descriptive variable names:
DATABASE_URLnotDB
❌ DON'T:
- Hardcode secrets in source code
- Commit
.envfiles with real credentials - Use production API keys in local development
- Share environment variables in chat messages or screenshots
- Reuse the same secrets across multiple projects
The Deployment Checklist
Before pushing to production, verify:
- ✅ Feature works correctly in staging
- ✅ All environment variables are configured
- ✅ Database migrations are applied (if applicable)
- ✅ Tests pass locally and in CI (if using GitHub Actions)
- ✅ No console errors or warnings in staging
- ✅ Mobile responsiveness checked
- ✅ Performance is acceptable (no 5-second page loads)
- ✅ Third-party integrations tested (webhooks, OAuth, etc.)
- ✅ No hardcoded development URLs or secrets in code
Pro tip: Create this as a GitHub issue template or save it in your project's DEPLOYMENT.md.
Checklists prevent "I forgot to update the environment variable" disasters.
What About Monitoring?
For solo developers just starting out, your hosting platform's built-in monitoring is enough:
- Vercel: Built-in analytics, deployment logs, error tracking
- Railway: Service metrics, deployment logs, uptime monitoring
- Render: Service metrics, deployment logs, health checks
- Fly.io: Monitoring dashboard, metrics, health checks
When to add dedicated monitoring:
- You have paying customers who depend on uptime
- You need to debug production errors that aren't obvious from logs
- You want detailed performance metrics
If you reach that point, consider:
- Sentry for error tracking (free tier is generous)
- LogRocket for session replay and debugging
- BetterStack for uptime monitoring
Don't add these until you actually need them. Your platform's native tools are enough for 95% of early stage projects. Focus on building features, not setting up monitoring infrastructure.
Handling Deployment Failures
When staging deployment fails:
- Check the deployment logs (every platform shows these)
- Look for common issues: build errors, missing dependencies, environment variables not set
- Ask AI to debug with the error logs: "Here are the deployment logs, what's wrong?"
- Fix locally, push again
When production deployment fails (but staging worked):
- Check if environment variables are different between staging and prod
- Look for hardcoded staging URLs in your code
- Verify database migrations ran successfully
Emergency rollback: every hosting platform will have some kind of rollback feature to go back to a previous deployment. If production is broken and you're panicking, just rollback immediately. Debug and fix in staging, then redeploy when it's working. Don't try to debug production in real-time.
Your Simple Deployment Flow
Here's what your day-to-day deployment process should look like:
- Build feature locally → Test on
localhost, fix bugs, verify database operations, polish UI, run full test suite - Push to staging branch → Automatic deployment to staging environment
- Test in staging → Real URLs, real performance, real behavior
- Merge to main → Automatic deployment to production
- Quick production check → Open production URL, verify feature works
Total time from "feature complete" to "live in production": 5-10 minutes.
Deployment should be boring. Automated. Reliable. Set it up once, then forget about it and focus on building features.
🔒 Part 12: Special Audits
AI-generated code moves fast. Sometimes too fast. AI coding assistants don't think about security hardening, performance optimization, or cost efficiency the same way experienced developers do. They'll generate code that works, but that code might:
- Leave security vulnerabilities wide open (insecure API endpoints, weak authentication, exposed credentials)
- Create performance bottlenecks (inefficient database queries, memory leaks, poorly optimized algorithms)
- Rack up expensive bills (unnecessary API calls, bloated cloud resources, inefficient third-party service usage)
That's where special audits come in. Unlike your continuous testing and code review, these are scheduled deep-dives—comprehensive inspections that catch the mess AI-generated code can create before it becomes a crisis. This section covers three types of audits you should run regularly:
- Security Audits - Find vulnerabilities before attackers do
- Performance Audits - Identify bottlenecks and optimize for speed
- Cost Audits - Control spending on APIs, cloud services, and AI usage
Think of these as cleaning up after the AI party. Let's break down each one.
🛡️ Security Audits
Security audits focus on identifying vulnerabilities, attack vectors, and potential exploits in your codebase. AI can generate functionally correct code that's full of security holes, especially when dealing with authentication, authorization, data validation, and external APIs.
Pro tip: While I provide typical things to focus on below, the best approach is to let Claude Code run the audit. The templates include the prompt at audits/security_audit_prompt.md and, more usefully, the /security-audit skill in setup/.claude/skills/. Run /security-audit payments and auth and it reviews that scope read-only, then reports evidence, severity, and fixes. For the branch you are about to push, the built-in /security-review is the quick version.
Why Security Audits Matter
Overall AI coding assistants prioritize making things work over making them secure.
Research consistently shows that AI-generated code often introduces vulnerabilities even in syntactically correct implementations. Studies (such as the Veracode 2025 GenAI Code Security Report) have found that security performance in AI-generated code remains flat regardless of model sophistication. The AI doesn't think about edge cases like SQL injection, XSS attacks, or exposed API keys—it just wants the feature to work.
If you scroll through X, you'll find plenty of cautionary tales from developers who shipped AI-generated code without security reviews. The pattern is always the same: app works great in testing, gets deployed, then gets compromised within days because the AI prioritized functionality over security fundamentals.
Real-world example: An AI might generate an authentication endpoint that works perfectly in testing but forgets to verify the user owns the resource they're accessing. This creates an IDOR (Insecure Direct Object Reference) vulnerability where any authenticated user can access any other user's data by changing an ID in the URL.
OWASP Top 10 Coverage
Security is a beast of its own and you could go down a very big rabbit hole on this.
My approach is to cover the 20% of security threats that lead to 80% of the headaches. Unless you are Uber or OpenAI, you are unlikely to be dealing with extremely sophisticated Russian hackers. You will be dealing with the most common attacks.
A good start is to make sure your regular security audits check against the OWASP Top 10. The OWASP Top 10 is a standard awareness document that represents a broad consensus about the most critical security risks to web applications. Developers use it as a first step toward more secure coding.
It covers:
- Broken Access Control
- Cryptographic Failures
- Injection Attacks (SQL, XSS, etc.)
- Insecure Design
- Security Misconfiguration
- Vulnerable and Outdated Components
- Identification and Authentication Failures
- Software and Data Integrity Failures
- Security Logging and Monitoring Failures
- Server-Side Request Forgery (SSRF)
Don't try to memorize this list unless you plan to make app security your full-time job. Just reference it during audits and spot-check your codebase for each category.
Security Auditing Tools
Below is a list of tools (apps and MCPs) you can use to stress test your code's security:
- Semgrep - SAST, SCA, and secrets scanning with AI-powered noise filtering. Specifically designed for "Secure Vibe Coding" with features that reduce false positives in AI-generated code. Includes an MCP server for running security scans directly from Claude Code. Free community edition available.
- OWASP ZAP - Free, open-source penetration testing tool (actively maintained)
- Snyk - Dependency vulnerability scanning (free tier: unlimited tests for open-source projects)
- SonarQube - Static code analysis (free community edition)
- Burp Suite - Web application security testing (free community edition, paid pro version)
npm audit/pip-audit/cargo audit- Built-in dependency checkers (free, run them regularly)
How to use them:
- Run Semgrep in CI/CD to catch security issues in AI-generated code with minimal false positives
- Run
npm auditorpip-auditweekly in CI/CD - Use Snyk for automated pull requests fixing vulnerabilities
- Run OWASP ZAP or Burp Suite before major releases
⚡ Performance Audits
Performance directly impacts user experience and business outcomes. Two widely cited numbers:
- Akamai (2017) measured a 7% drop in conversions for every extra 100ms of load time on retail sites
- Google (2016) found that 53% of mobile visits are abandoned when a page takes longer than 3 seconds to load
The studies are old and the exact figures vary by site, but the direction has not changed.
Google also uses page speed as a ranking factor for SEO. Slow sites rank lower in search results.
AI generates code that works, but it doesn't think about efficiency. It'll happily create N+1 query problems, load entire datasets into memory, or make redundant API calls, because... why not?
Performance audits identify bottlenecks, inefficient code, and resource-heavy operations. AI often prioritizes "making it work" over "making it fast," leading to performance issues that only surface at scale.
The best approach is to let Claude Code run the audit. The templates include two skills:
/performance-audit- the whole application (prompt:audits/performance_audit_general_prompt.md)/performance-audit-page checkout- one page, screen, endpoint, or workflow (prompt:audits/performance_audit_page_specific_prompt.md)
Both are read-only and report measured bottlenecks, not guesses. Pair them with Claude in Chrome or the Chrome DevTools MCP when you need real traces.
Performance Audit Types
You'll typically run two types of performance audits: general audits (broad overview) and page-specific audits (targeted debugging).
1. General Performance Audit
A comprehensive review of your entire application to establish baseline metrics and identify systemic issues.
When to run: Monthly, or after major feature additions
Tools you can use:
- Lighthouse - Comprehensive performance audits with scores and recommendations (built into Chrome DevTools)
- Chrome DevTools Performance panel - Deep runtime analysis with flame charts
- WebPageTest - Real-world performance testing from different locations and devices
- GTmetrix - Performance scores and optimization recommendations
- React DevTools Profiler - React-specific optimization (free browser extension)
How to run a general audit:
- Open your site in Chrome Incognito (to avoid extensions)
- Open DevTools → Lighthouse tab
- Select "Performance" and "Desktop" or "Mobile"
- Click "Analyze page load"
- Review scores for Performance, Accessibility, Best Practices, SEO
- Check the "Opportunities" section for actionable improvements
- Prioritize fixes with the largest impact (measured in seconds saved)
What to look for:
- Performance score under 90 (anything below 50 is critical)
- LCP over 2.5 seconds
- Large bundle sizes (over 500KB compressed)
- Unused JavaScript or CSS
- Images not optimized or lazy-loaded
2. Page-Specific Performance Audit
A targeted investigation when a specific page or feature is noticeably slow.
When to run: When users report slow pages, or when monitoring tools flag specific routes
Tools you can use:
- Chrome DevTools Performance panel - Record and analyze exactly what's happening during page load
- Chrome DevTools Network tab - Identify slow-loading resources and large files
- Chrome DevTools Coverage tab - Find unused JavaScript/CSS on this specific page
How to run a page-specific audit:
- Open the slow page in Chrome Incognito
- Open DevTools → Network tab
- Enable "Disable cache" and refresh the page
- Sort by "Size" to find large files (images, scripts, fonts)
- Sort by "Time" to find slow-loading resources
- Switch to Performance tab → Click record → Refresh page → Stop recording
- Examine the flame chart for long tasks (anything over 50ms blocks the main thread)
What to look for (some common examples):
- API calls taking over 1 second (consider caching or optimization)
- Images over 200KB (compress or use next-gen formats like WebP)
- Third-party scripts blocking page load (defer or async them)
- JavaScript execution taking over 500ms (code-split or optimize)
- Unnecessary re-renders in React (use React DevTools Profiler)
You can take screenshots or download reports from filtered data in the Network or Performance tabs (they download as .har and .json files), and give them to Claude Code to investigate those performance issues. It works remarkably well.
How to use them:
- Run Lighthouse monthly and after major UI changes
- Use Chrome DevTools when debugging slow pages
- Set up New Relic or Sentry for production monitoring (once you have users)
💰 Cost Audits
Cost audits help identify and reduce expenses from third-party APIs, cloud services, and AI model usage.
While I provide typical things to focus on below, the best approach is to let Claude Code run the audit. The templates include the /cost-audit skill. Run /cost-audit OpenAI and Vercel spend and it scans the code paths that call paid services, estimates call volume, and proposes reductions. Point it at your billing exports when you have them.
AWS, GCP, and Azure all have cost calculators and billing dashboards. Check them monthly. Set up billing alerts to catch spikes early.
Most cloud providers offer cost anomaly detection. Enable it. It'll alert you if spending suddenly spikes.
If you're a solo developer with a $50/month bill, monthly reviews are enough. But if you're spending $1,000+/month, weekly reviews catch problems before they become disasters.
Overall auditing costs focus on four key areas:
1. Third-Party APIs
Every external service adds to your monthly bill. You can easily build a list of all the APIs you use by scanning your environment variable file. It's a good idea to keep a .md file somewhere with an updated list.
For each, have Claude Code help you figure out:
- How many API calls are you making?
- What triggers calls?
- What's the cost per call?
- Can you reduce calls without hurting the user experience?
2. Cloud Infrastructure
Your cloud provider bill breaks down into several areas:
- Compute: Over-provisioned instances, idle staging environments
- Storage: S3/Blob storage, unused snapshots, old backups
- Database: Instance sizing, IOPS provisioning, unnecessary read replicas
- Network: Data transfer (especially cross-region), load balancers, NAT gateways
3. AI Model Costs (if any)
LLM APIs often become the biggest surprise cost:
- Model selection: Using top-tier frontier models for routine tasks when a cheaper fast model would work just as well
- Token efficiency: Long prompts and responses add up fast
- Caching: Re-generating identical responses wastes money
- Batching: Combining requests reduces overhead
Example: 100K API calls/day at $0.01 each = $30K/month. Optimize to $0.001 = $3K/month.
4. Code Patterns
Bad code multiplies costs across all other areas:
- Missing caching: Calling APIs for data that rarely changes
- Loops with API calls: Making 100 individual calls instead of one batch request
- Database queries: Missing indexes, full table scans, fetching unnecessary columns
- Redundant requests: Multiple components fetching the same data independently
One inefficient query could force you to upgrade from a $50/month database to a $500/month one.
🔍 Best Practices for All Audits
Don't wait for problems to appear. Make audits part of your workflow.
- Establish a cadence for each audit type
- Don't wait for users to report security issues or slow pages
- Make audits part of your development workflow (not an afterthought)
- Review and adjust audit scope as your application evolves
- Put the cadence in Claude Code, not in your memory:
/looprepeats a skill on an interval inside a session, and/schedulecreates a cloud routine that runs it on a cron when your plan includes routines
Regular audits help you build with confidence. You're moving fast with AI, but you're also building a foundation that lasts. If you are building a Proof of Concept, you probably don't care about any of this. But as soon as real users start paying you, you have no choice but to care.
⚡ Part 13: Tips and Tricks
These are small workflow optimizations that I've discovered over time that can dramatically speed up your vibe coding sessions. I will keep editing this part as I find new ones.
🎤 Use Voice Commands
The problem: Typing long, detailed instructions to Claude Code is slow and breaks your creative flow. When you are focused, switching between thinking and typing creates friction.
The solution: Claude Code has built-in voice dictation. Run /voice, choose hold or tap mode, and speak directly into the CLI. Voice input requires a Claude.ai account. It is not available when you authenticate through the Anthropic API, Amazon Bedrock, Google Vertex AI, or Microsoft Foundry.
/voiceIn hold mode, press and hold Space while you speak. In tap mode, press Space once to start and once to stop. Claude Code transcribes your speech into the prompt box. You can review the text before you send it.
You can also use a system-wide voice-to-text tool if you prefer one voice workflow across all your applications.
Recommended tools:
Wispr Flow (The one I use)
Best overall voice-to-text experience. Incredibly accurate transcription with minimal latency. It works system-wide, so it integrates seamlessly with Claude Code.
Aqua Voice (YC-backed)
Another excellent option with fast transcription and good accuracy. If Wispr Flow doesn't work for your setup, Aqua Voice is a solid alternative. I switch back to it sometimes.
SuperWhisper
Great if you want full control over which AI model handles transcription. Supports OpenAI Whisper, but also lets you choose other models depending on your preference for speed, accuracy, or cost.
How to use voice commands with Claude Code:
- Run
/voice, or install one of the external tools above - Activate voice input
- Speak your instruction naturally: "Add a modal that shows user details when clicking on a table row. The modal should have a close button in the top right corner and display the user's name, email, and creation date."
- Review the transcribed text in the Claude Code prompt box
- Press
Enterto send it
Why this matters: You can describe complex features 3-5x faster than typing. Voice also forces you to think through requirements more clearly—when you speak, you naturally structure your thoughts better than when typing fragmented sentences.
Real workflow: Many vibe coders use voice for initial feature descriptions and queuing quick fixes, then switch to typing for precise code tweaks or debugging instructions. The combination is unbeatable.
📋 Ask Side Questions Without Interrupting
The problem: You are watching Claude Code implement a feature, and you remember a question or another task. If you interrupt the current turn, you can break its flow.
The solution: Use /btw to ask a quick side question while Claude Code is still working.
How it works:
- Type
/btwfollowed by your question - The side question runs without interrupting the main turn
- It can use the current conversation context
- It cannot read new files, run commands, or search
- The question and answer do not enter the main conversation history
Example scenario:
You ask Claude Code to "Add a delete button to the user table." While it is working, you want to remember the name of the shared button component:
/btw what is the name of the shared button component you found?Why this matters: You get the answer without changing the active task or adding noise to the session context.
Pro tip: Use /btw only for questions that Claude can answer from the current context. For a new task that needs tools, use /background, start a subagent, or wait for the current turn to finish.
⏮️ Use Checkpoints to Roll Back Bad Agent Decisions
The problem: You're deep in a conversation with the agent, and it takes a wrong turn—implementing the feature in a way you didn't intend or making changes that break something. Rather than trying to correct it with more prompts (which can compound the problem), you want to cleanly revert to before things went sideways.
The solution: Use Claude Code checkpoints to restore the session to an earlier prompt. Run /rewind or press Esc twice.
How it works:
- Claude Code creates a checkpoint before each prompt
- Run
/rewindor pressEsctwice - Select an earlier prompt
- Restore the code, the conversation, or both
- Resume from that point with clearer instructions
Why this matters: It's version control within your chat session. Instead of typing "no, undo that and do it this way" (which wastes tokens and context), you just roll back. Clean slate, no confusion.
Pro tip: Checkpoints only cover changes made through Claude Code. Keep using Git for complete version control and long-term history.
🎯 Click-to-Source: Jump Directly to Component Code
The problem: You're testing your app in the browser and spot a typo or small wording issue. Using the LLM to fix it would be overkill. It costs tokens, takes time, and the agent might get confused if the text appears multiple places. You could copy the text, paste it in your editor's search, hunt through results... but that's cumbersome context switching.
The solution: Install code-inspector-plugin to click an element in your browser and open its source file in your configured editor. Claude Code stays open in the terminal next to it.
I discovered this workflow while testing Svelte (the frontend framework has this built-in), and thought it was such a nice addition that I wanted it everywhere I work. Here's how to bring it into your Next.js React application.
Setup (1 minute):
- Install the package:
pnpm add -D code-inspector-plugin- Update your
next.config.js:
const { codeInspectorPlugin } = require('code-inspector-plugin')

const nextConfig = {
  // ... your existing config

  webpack: (config, { dev }) => {
    config.plugins.push(codeInspectorPlugin({
      bundler: 'webpack',
    }))
    return config
  },
}

module.exports = nextConfig- Restart your dev server and hard refresh your browser (
Cmd+Shift+R)
How to use:
- Open your app in the browser
- Hold
Option + Shift(Mac) orAlt + Shift(Windows) and hover over any element - Click it -> your editor opens the exact file and line
Pro tip: This works with any React component, including shadcn/ui components you've customized. Click a button, jump to button.tsx. Click a card, jump to your product card component. It's especially powerful for components where the same wording might be used across many pages.
🔔 Enable Agent Notifications
The problem: You're working on something else while an agent runs in the background. The agent finishes or needs input, but you don't notice for several minutes because you're focused on another task or have multiple agents running simultaneously.
The solution: Add a Claude Code Notification hook. It can run a system command when Claude needs input or permission.
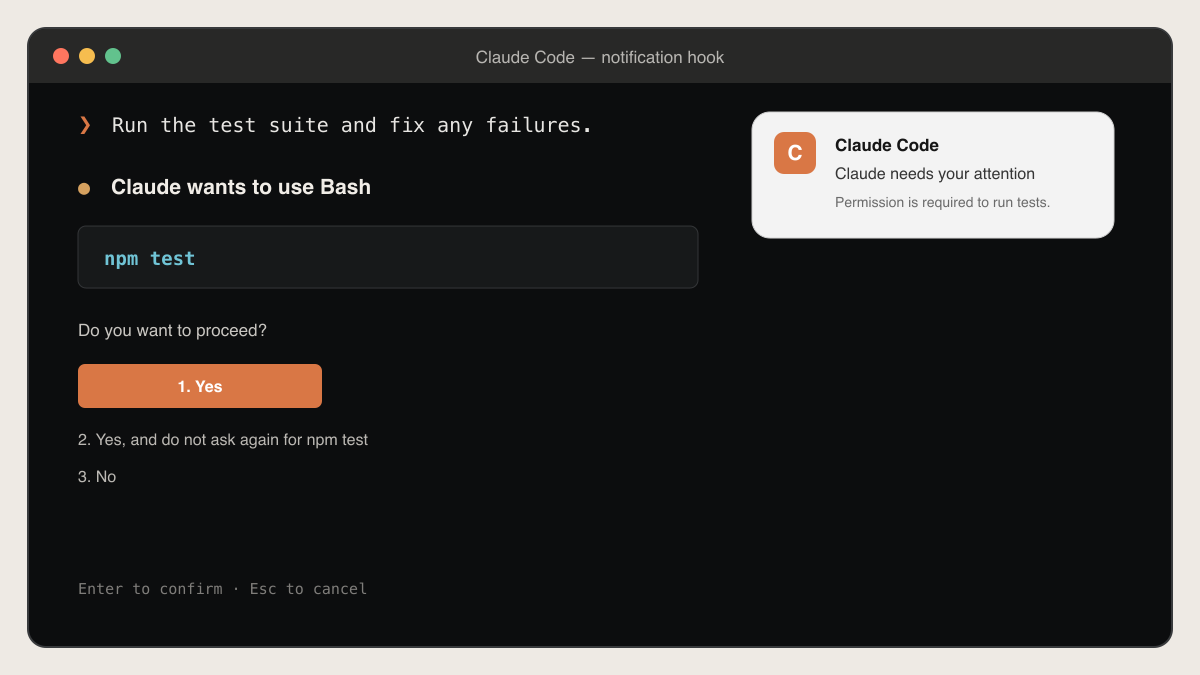
On macOS, add this to ~/.claude/settings.json:
{
  "hooks": {
    "Notification": [
      {
        "matcher": "",
        "hooks": [
          {
            "type": "command",
            "command": "osascript -e 'display notification \"Claude Code needs your attention\" with title \"Claude Code\"'"
          }
        ]
      }
    ]
  }
}
Use notify-send on Linux or PowerShell notification commands on Windows. If you use Claude Code through Remote Control, you can also get mobile push notifications.
When you run background agents or work across multiple sessions, notifications help you see when Claude needs input. You can work in another application and return only when needed.
📊 Keep Usage Summary Always Visible
The problem: You want to track context use, session cost, and plan limits without opening another page.
The solution: Run /usage for the full report. Then configure a Claude Code status line for a live summary.
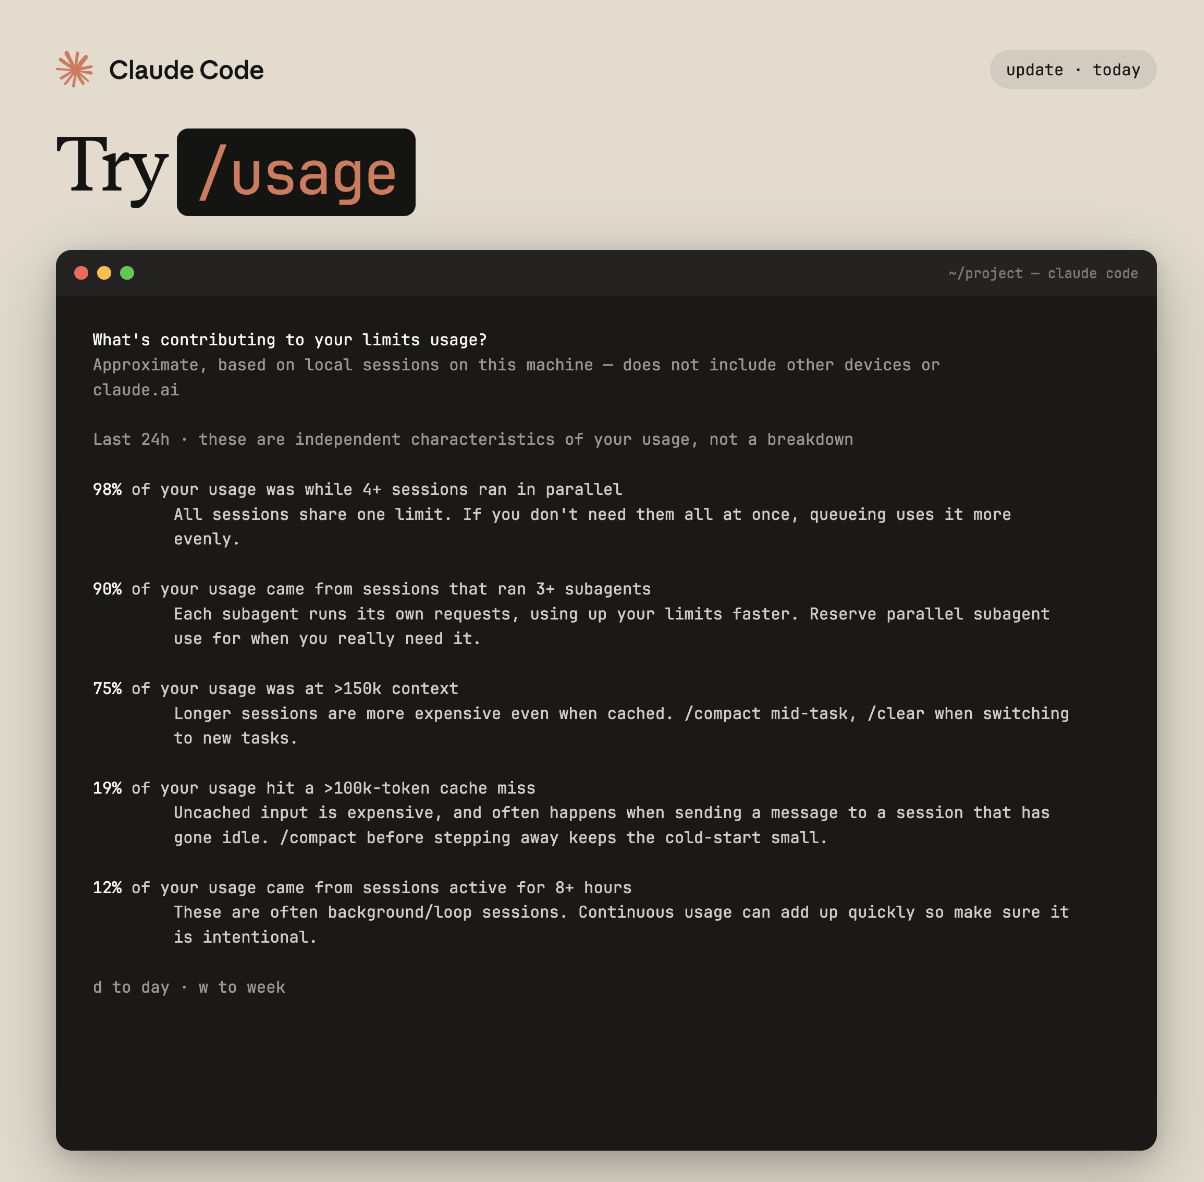 Check usage with /usage
How to enable:
- Run
/statusline - Ask Claude Code to show the model, Git branch, context percentage, session cost, and five-hour rate limit
- Review the generated script and settings change
- Run
/usagewhen you need the complete usage view
Why this matters: Visible usage data helps you see when context is nearly full or when a plan limit is close. You can compact the session, switch models, combine related tasks, or wait for the limit to reset.
📋 Your Claude Code Vibe Coding Checklist
Below is an interactive checklist to ensure you follow all the best practices when setting up your project in Claude Code. You can copy and paste it in Notion or anywhere else with nice formatting (it pastes as Markdown).
I hope you find this article helpful. I've put a lot of work into it.
This playbook tries to be as comprehensive as possible, and is still a work in progress.
If you have any feedback or want to discuss, reach out directly at julien@argil.io or on X (@JBerthom) - happy to talk.
Written with ❤️ by a human (still)